Scanning and organizing 50 years of negatives with the Kodak Slide N Scan
Sat, Feb 28, 2026
Alternative title: Yay, hours of recreational organization!
This (lengthy) post explains the process I used to digitize 1000s of film negatives in early 2026 using an inexpensive Kodak Slide n Scan scanner.
My goal was to create a digital archive of my family’s photos, and while I was at it, organize the negatives into some kind of system that would make it faster and easier to tell what was on each roll in the future. I estimate the time spent on this project to be around 45 hours and I worked on it bit by bit over the course of about a month and a half.
The end result: many GB of photos organized by roll, uploaded to Google photos, burned to DVD, with film stored in archival sleeves and binders. I also left detailed typed documentation with the film describing who is in the photos, how to access the digital copies, and how to do this workflow.
I have shared my process here in hopes that it helps someone else take on this kind of project! It wasn’t hard, just very time-consuming and repetitive.
Overall workflow
- Scan the negatives with the Kodak Slide n Scan
- Organize the digital files by roll and upload to Google Photos
- Burn the digital files to archival DVDs
- Store the negatives in archival sleeves and binders, and store the binders in archival boxes in a fire-resistant bag
Tools/supplies
Everything I bought and used for this project.
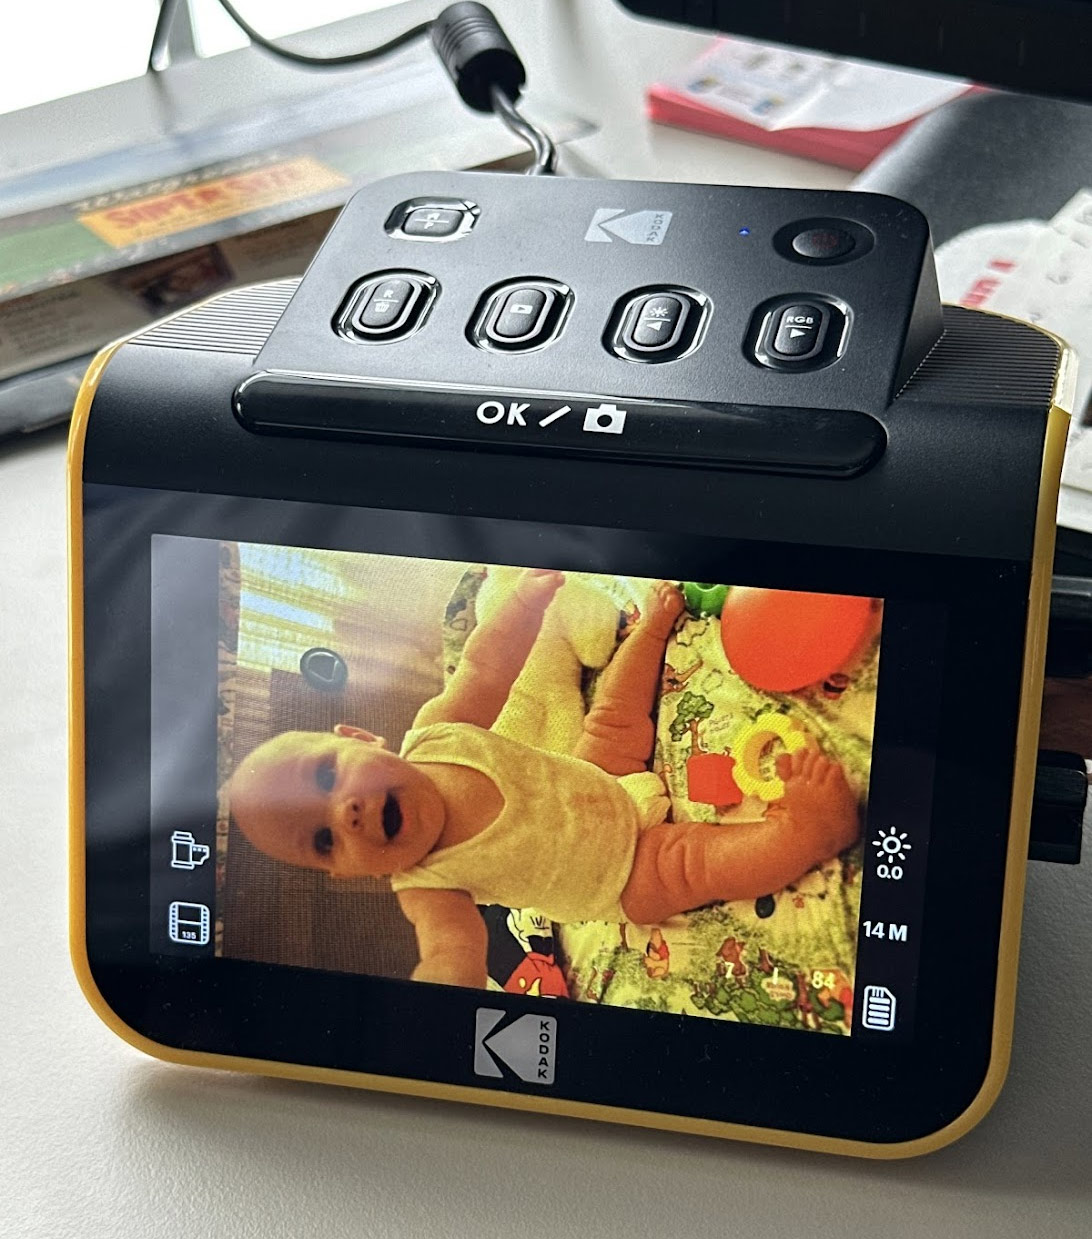
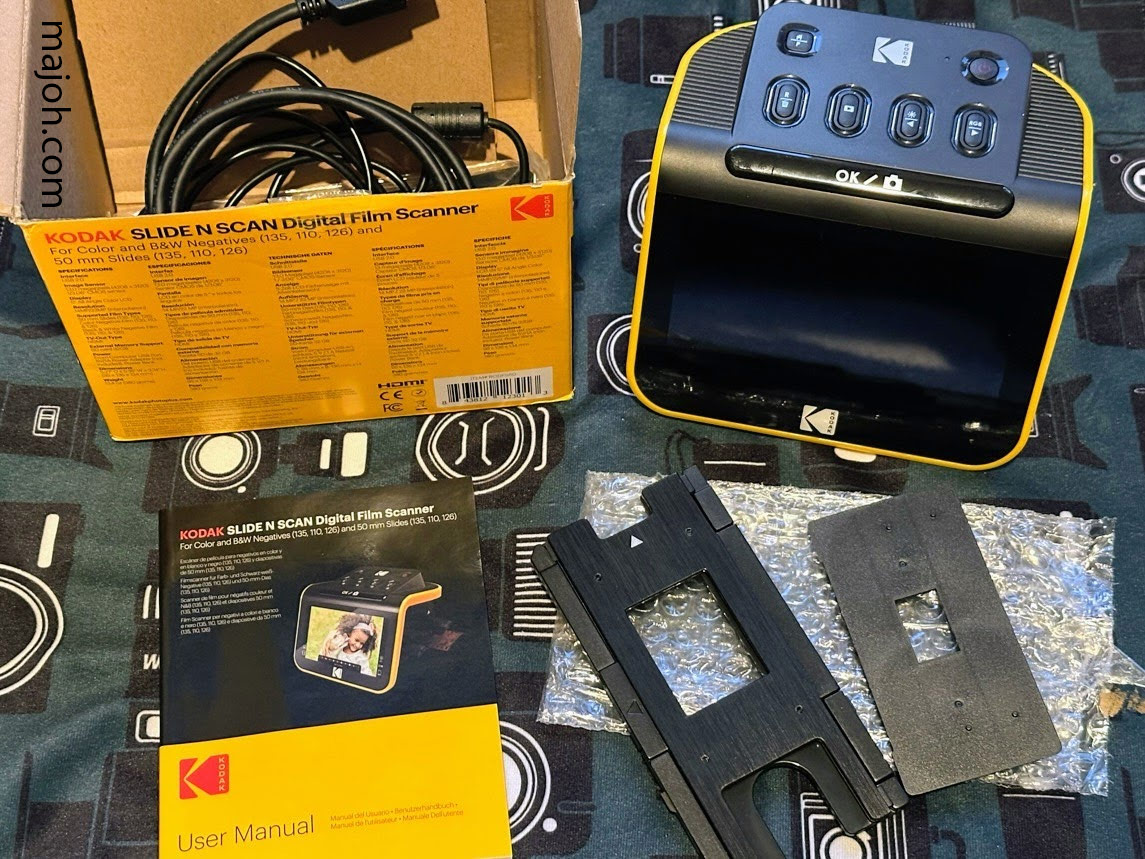
- Kodak Slide N Scan film scanner
- 32GB SDHC card for the Slide n Scan
- Large light table for viewing and organizing scrambled negatives (optional, but came in handy)
- 3-ring binders for storing the sleeves (I bought a mix of 2" and 1" and organized roughly by decade)
- Sheet protectors for 3-ring binder, I used these to hold the contact sheets for each roll of film
- Archival sleeves for 35mm negatives
- DVD burner and archival DVDs for writing the digital files to physical media
- Large table for sorting and organizing
- Computer with enough storage space for the scanned files
- Fire resistant bag to store the binders in
- Fire resistant archival boxes - I bought several of these for storing prints and non-photo memorabilia that was stashed with the prints
- Silica packets for good measure, just in case there’s any ambient moisture in the boxes
- Google Photos for cloud storage
Other workflows I considered:
- DIY with a light table and a digital camera - I have a digital camera and a light table, but this workflow felt complicated and like I was going to end up doing a lot of cropping in Photoshop.
- Find a higher quality film scanner, but this opened a can of research worms and I knew I was in too deep when I was reading about people looking for 2000s era scanners and building 2000s era PCs to run the 2000s era software (I mean, that actually sounds like fun, but hunting down a working scanner sounded like a pain that could have delayed this project indefinitely)
And that’s how I ended up on the workflow of “feed everything through the Slide n Scan and see what I’m even working with” workflow. I also figured that maybe I wouldn’t even feel like I need an expensive scanner after I saw what’s on these. I can always buy a fancy scanner later.
Kodak Slide n Scan scan quality
Before I began I wanted to assess the scanner’s quality. I purchased the scanner and scanned some of my own negatives that have already been professionally scanned by The Darkroom.
Would the Slide n Scan quality be good enough, or would I end up re-scanning later anyway?
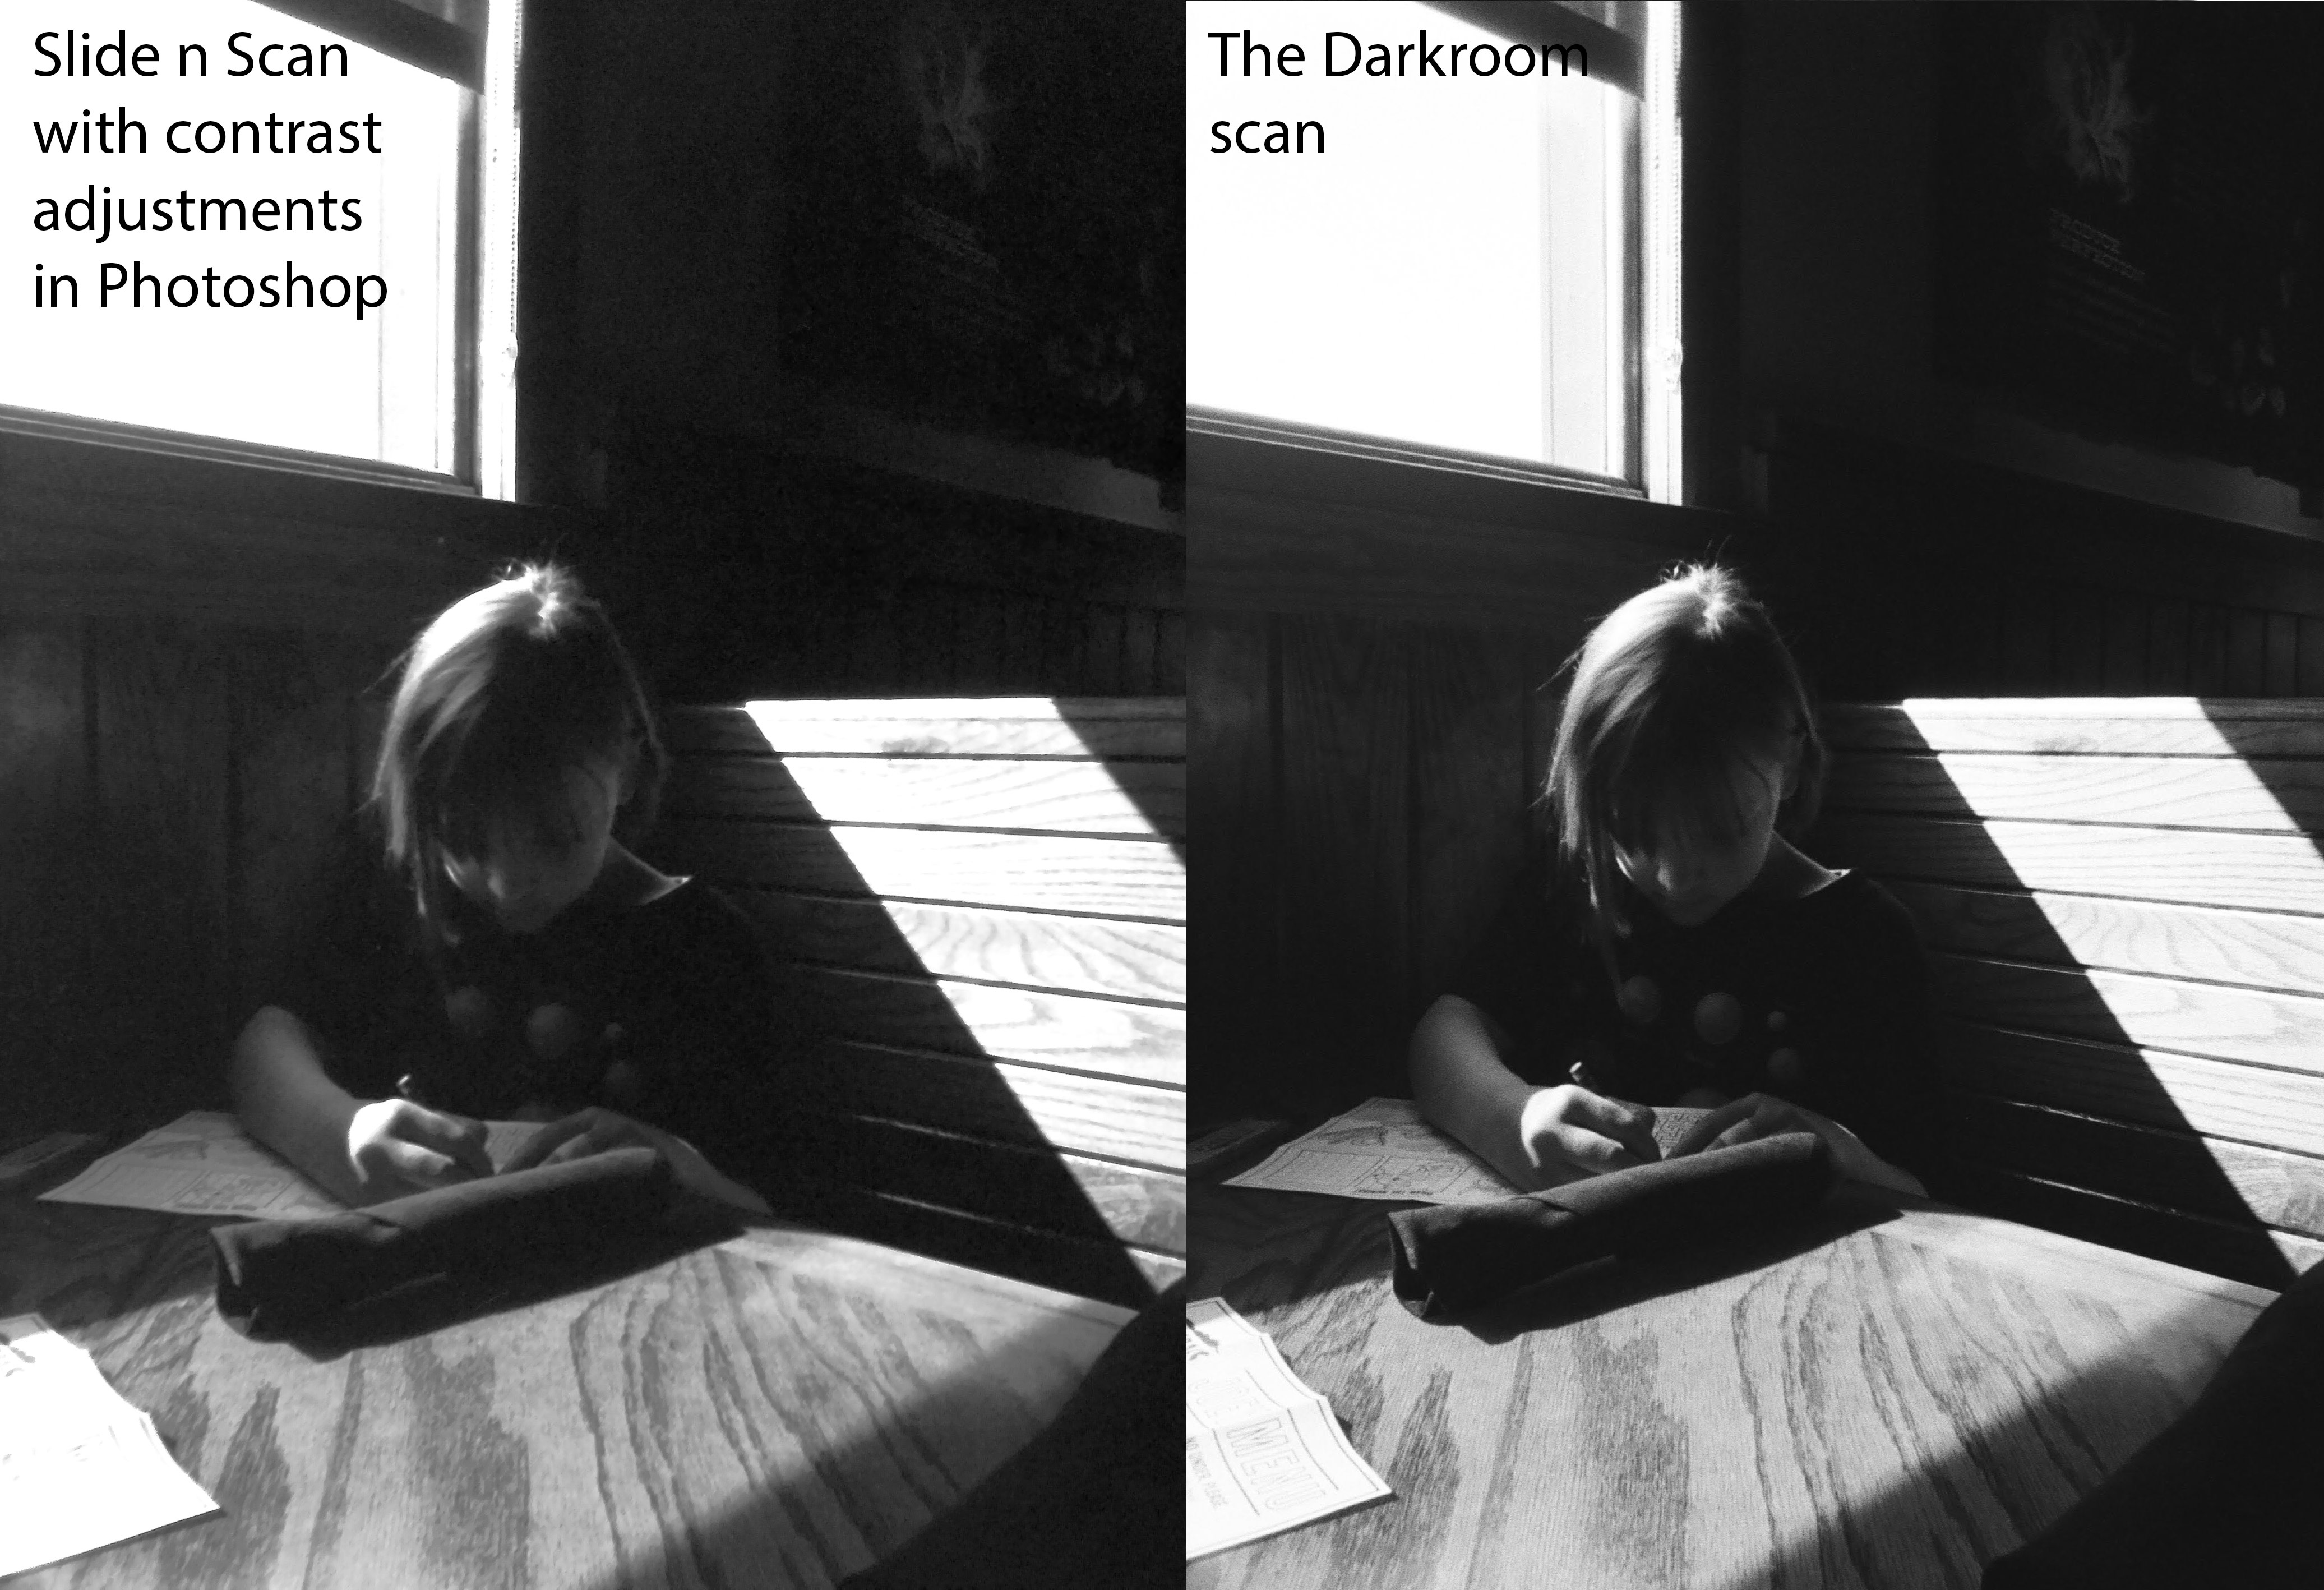
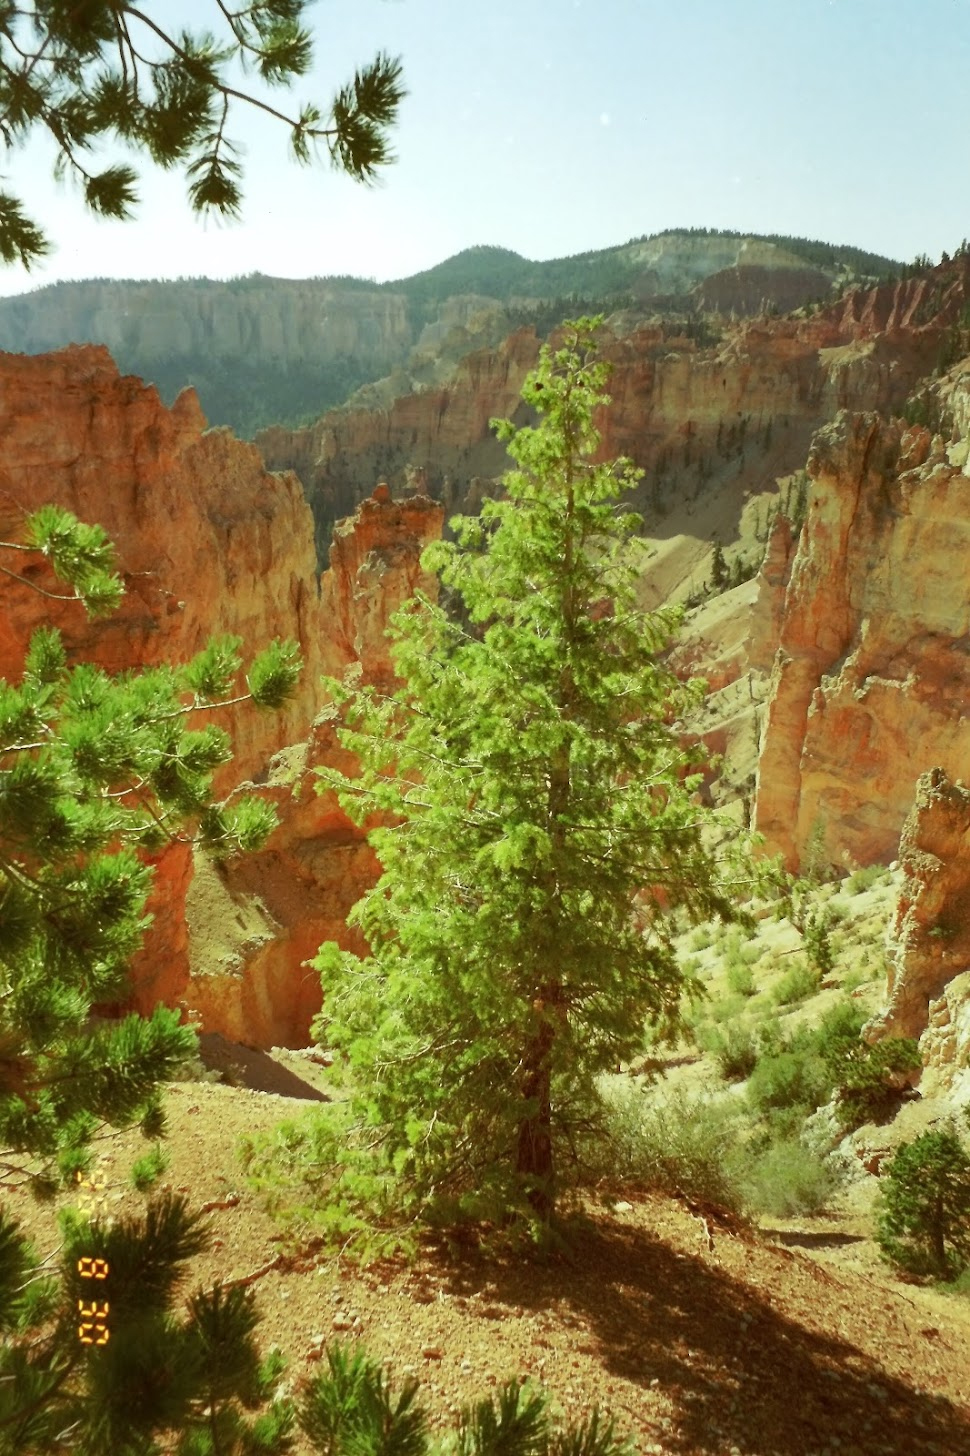
Here’s a photo I shot with my Ektar H35 on Tri-X B/W. I kept this sample image very high-res, so you can open it in a new tab and view it at full size.
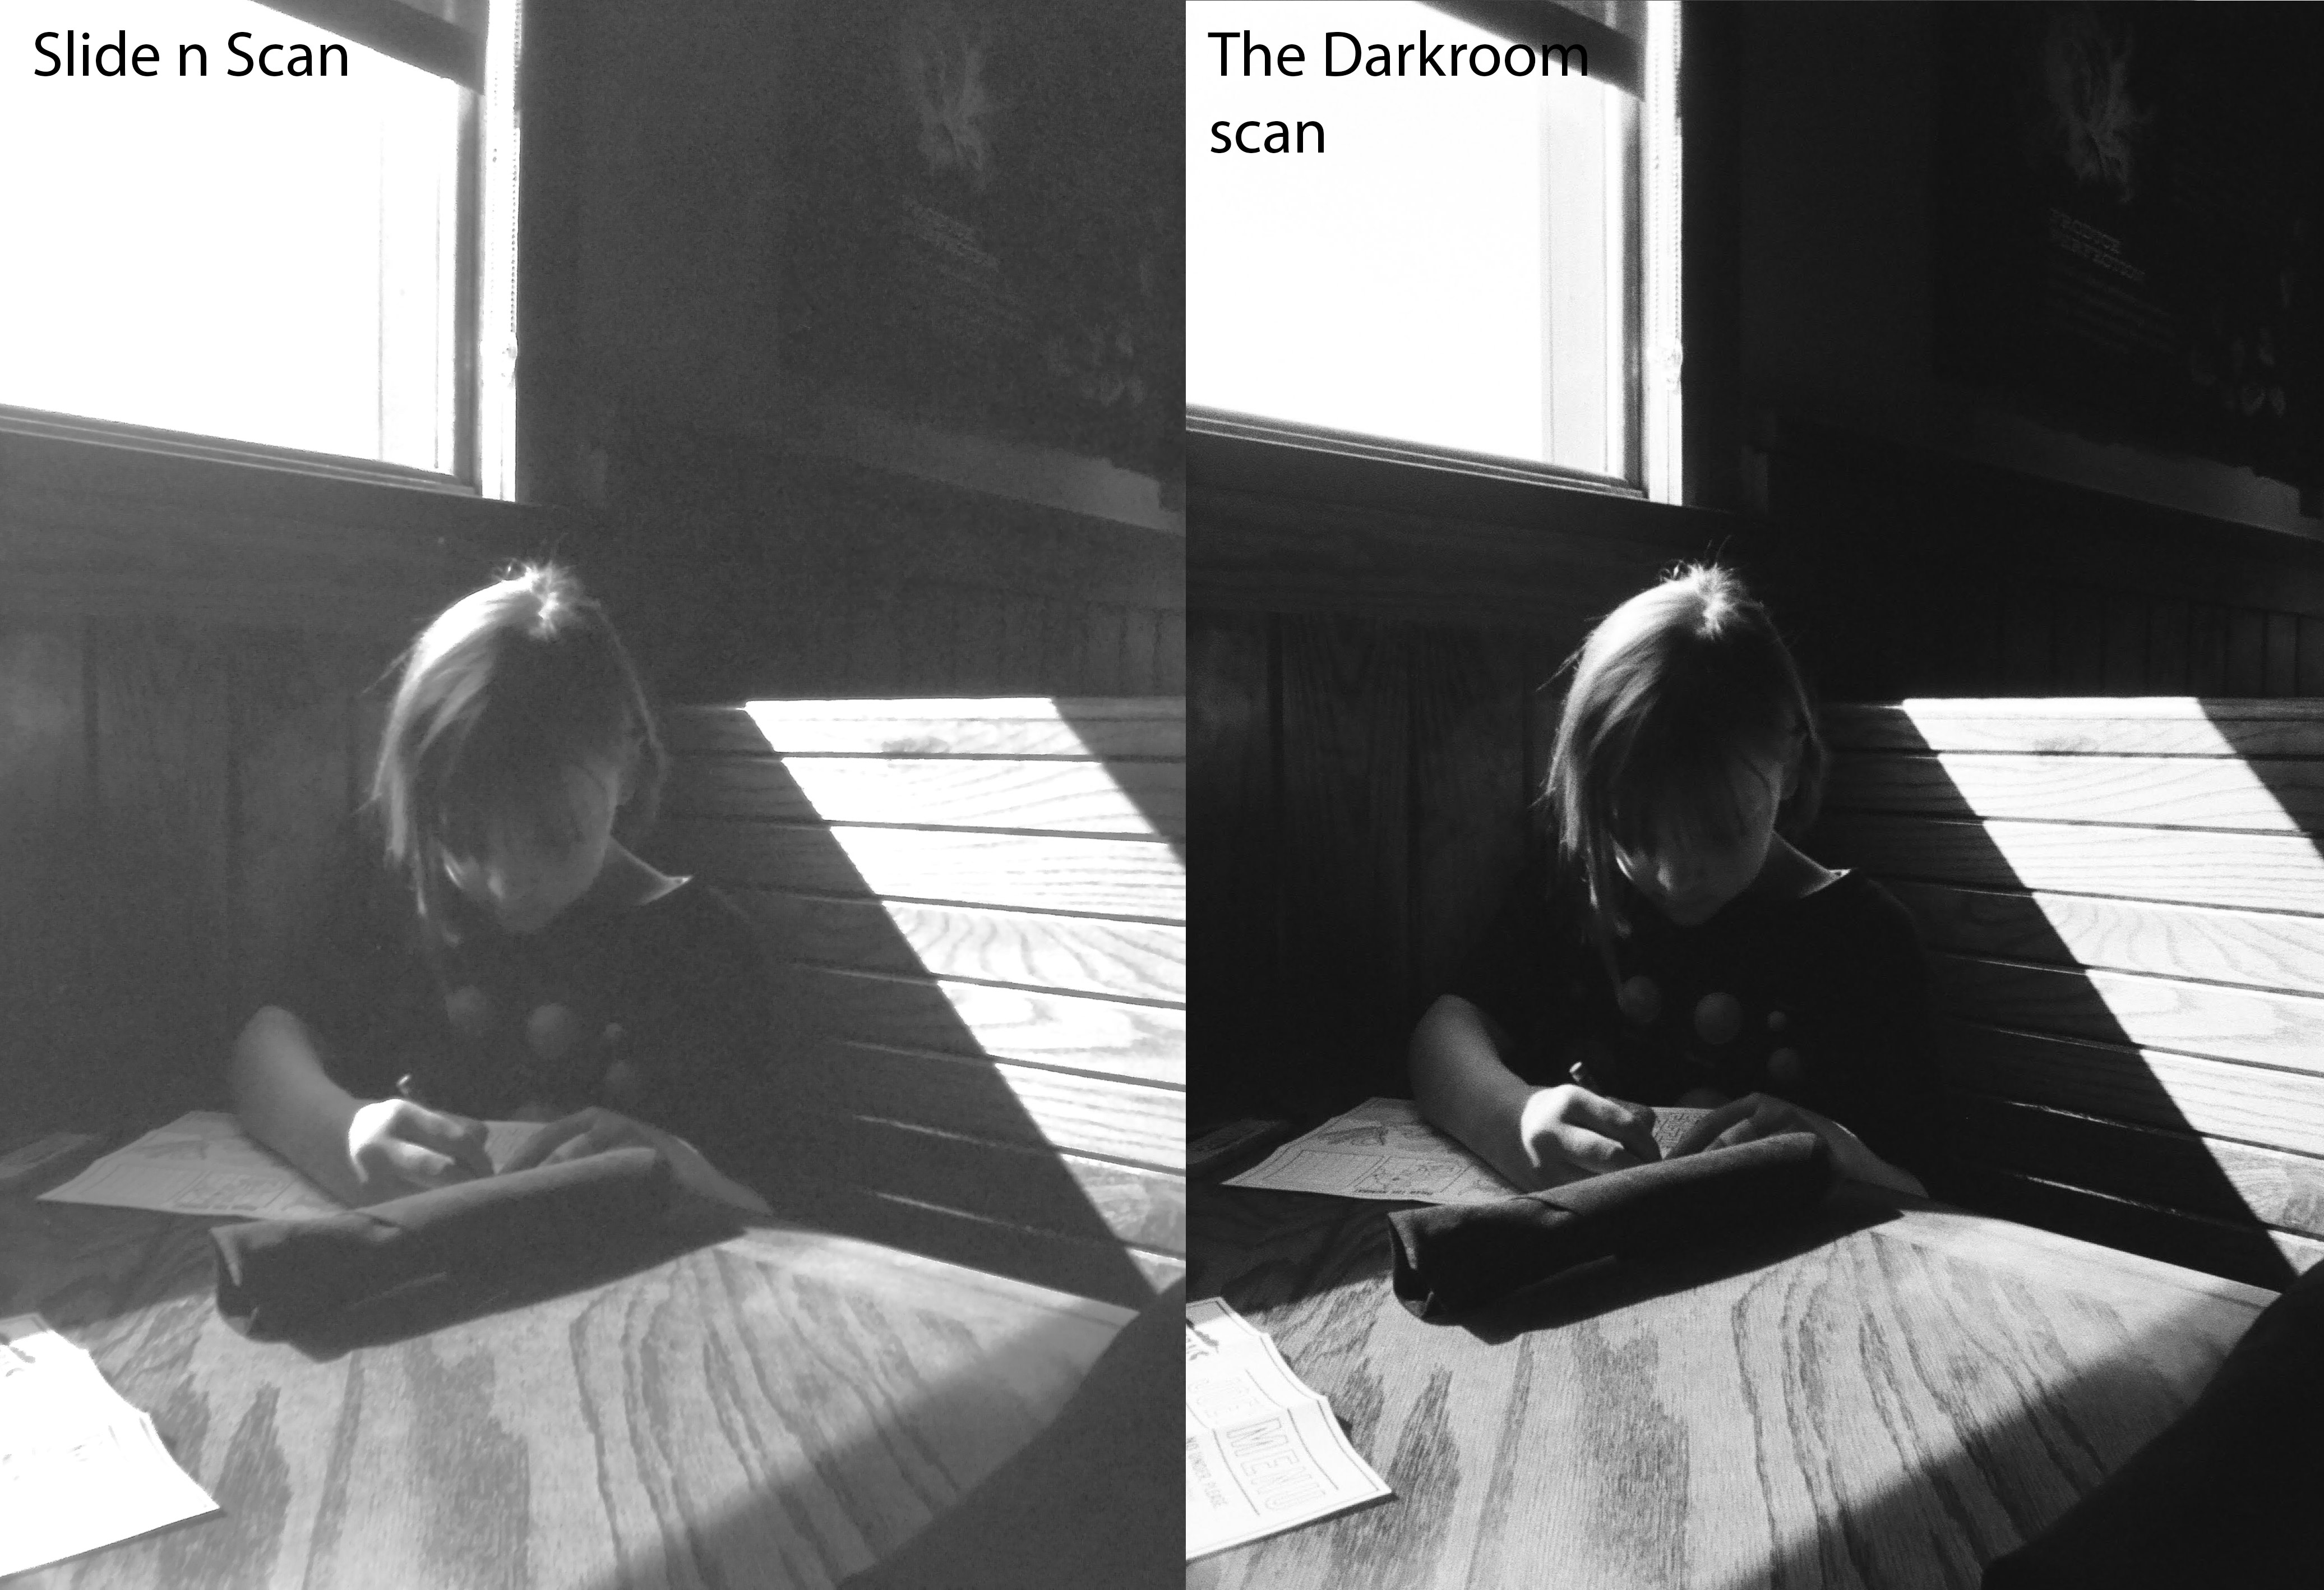
Right off the bat, it is apparent that The Darkroom did some contrast adjustment for me (that, or the Slide n Scan could not pull contrast from the negative in the same way). It is also obvious that the details are not as crisp in the Slide n Scan scans.
I gave my Slide n Scan scan a quick contrast adjustment in Photoshop. This helped pull out some of the details in the wood grain and the drawing. You know what? It’s not bad. For the purposes of seeing what’s on this heap of negatives, this is perfectly fine.
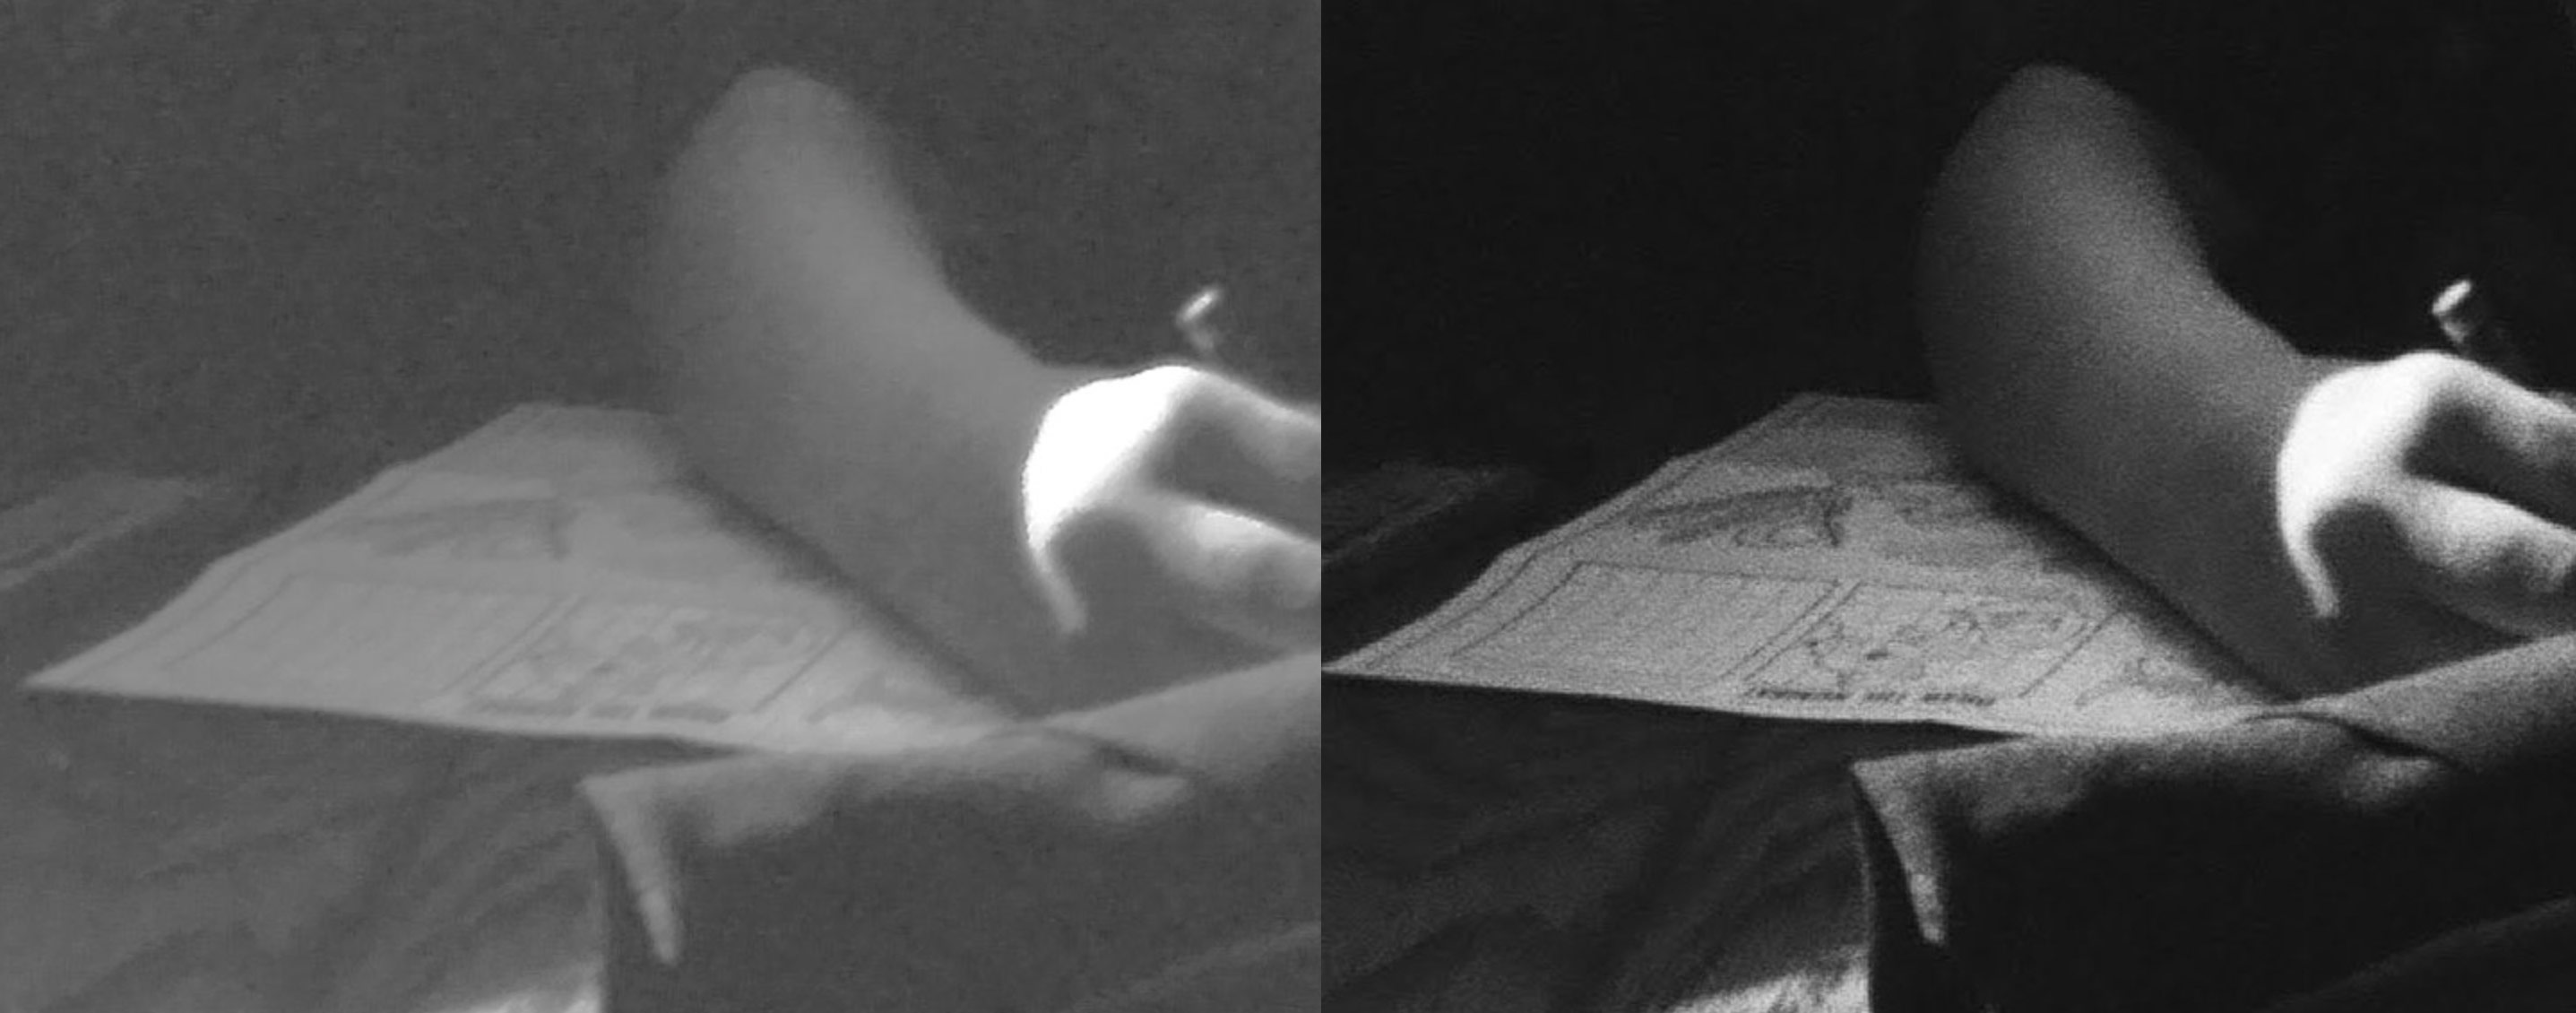
This next example is Portra 160 in the Ektar H35 half frame camera.
(this is another full-res sample image that you can view in a new tab to see the details)
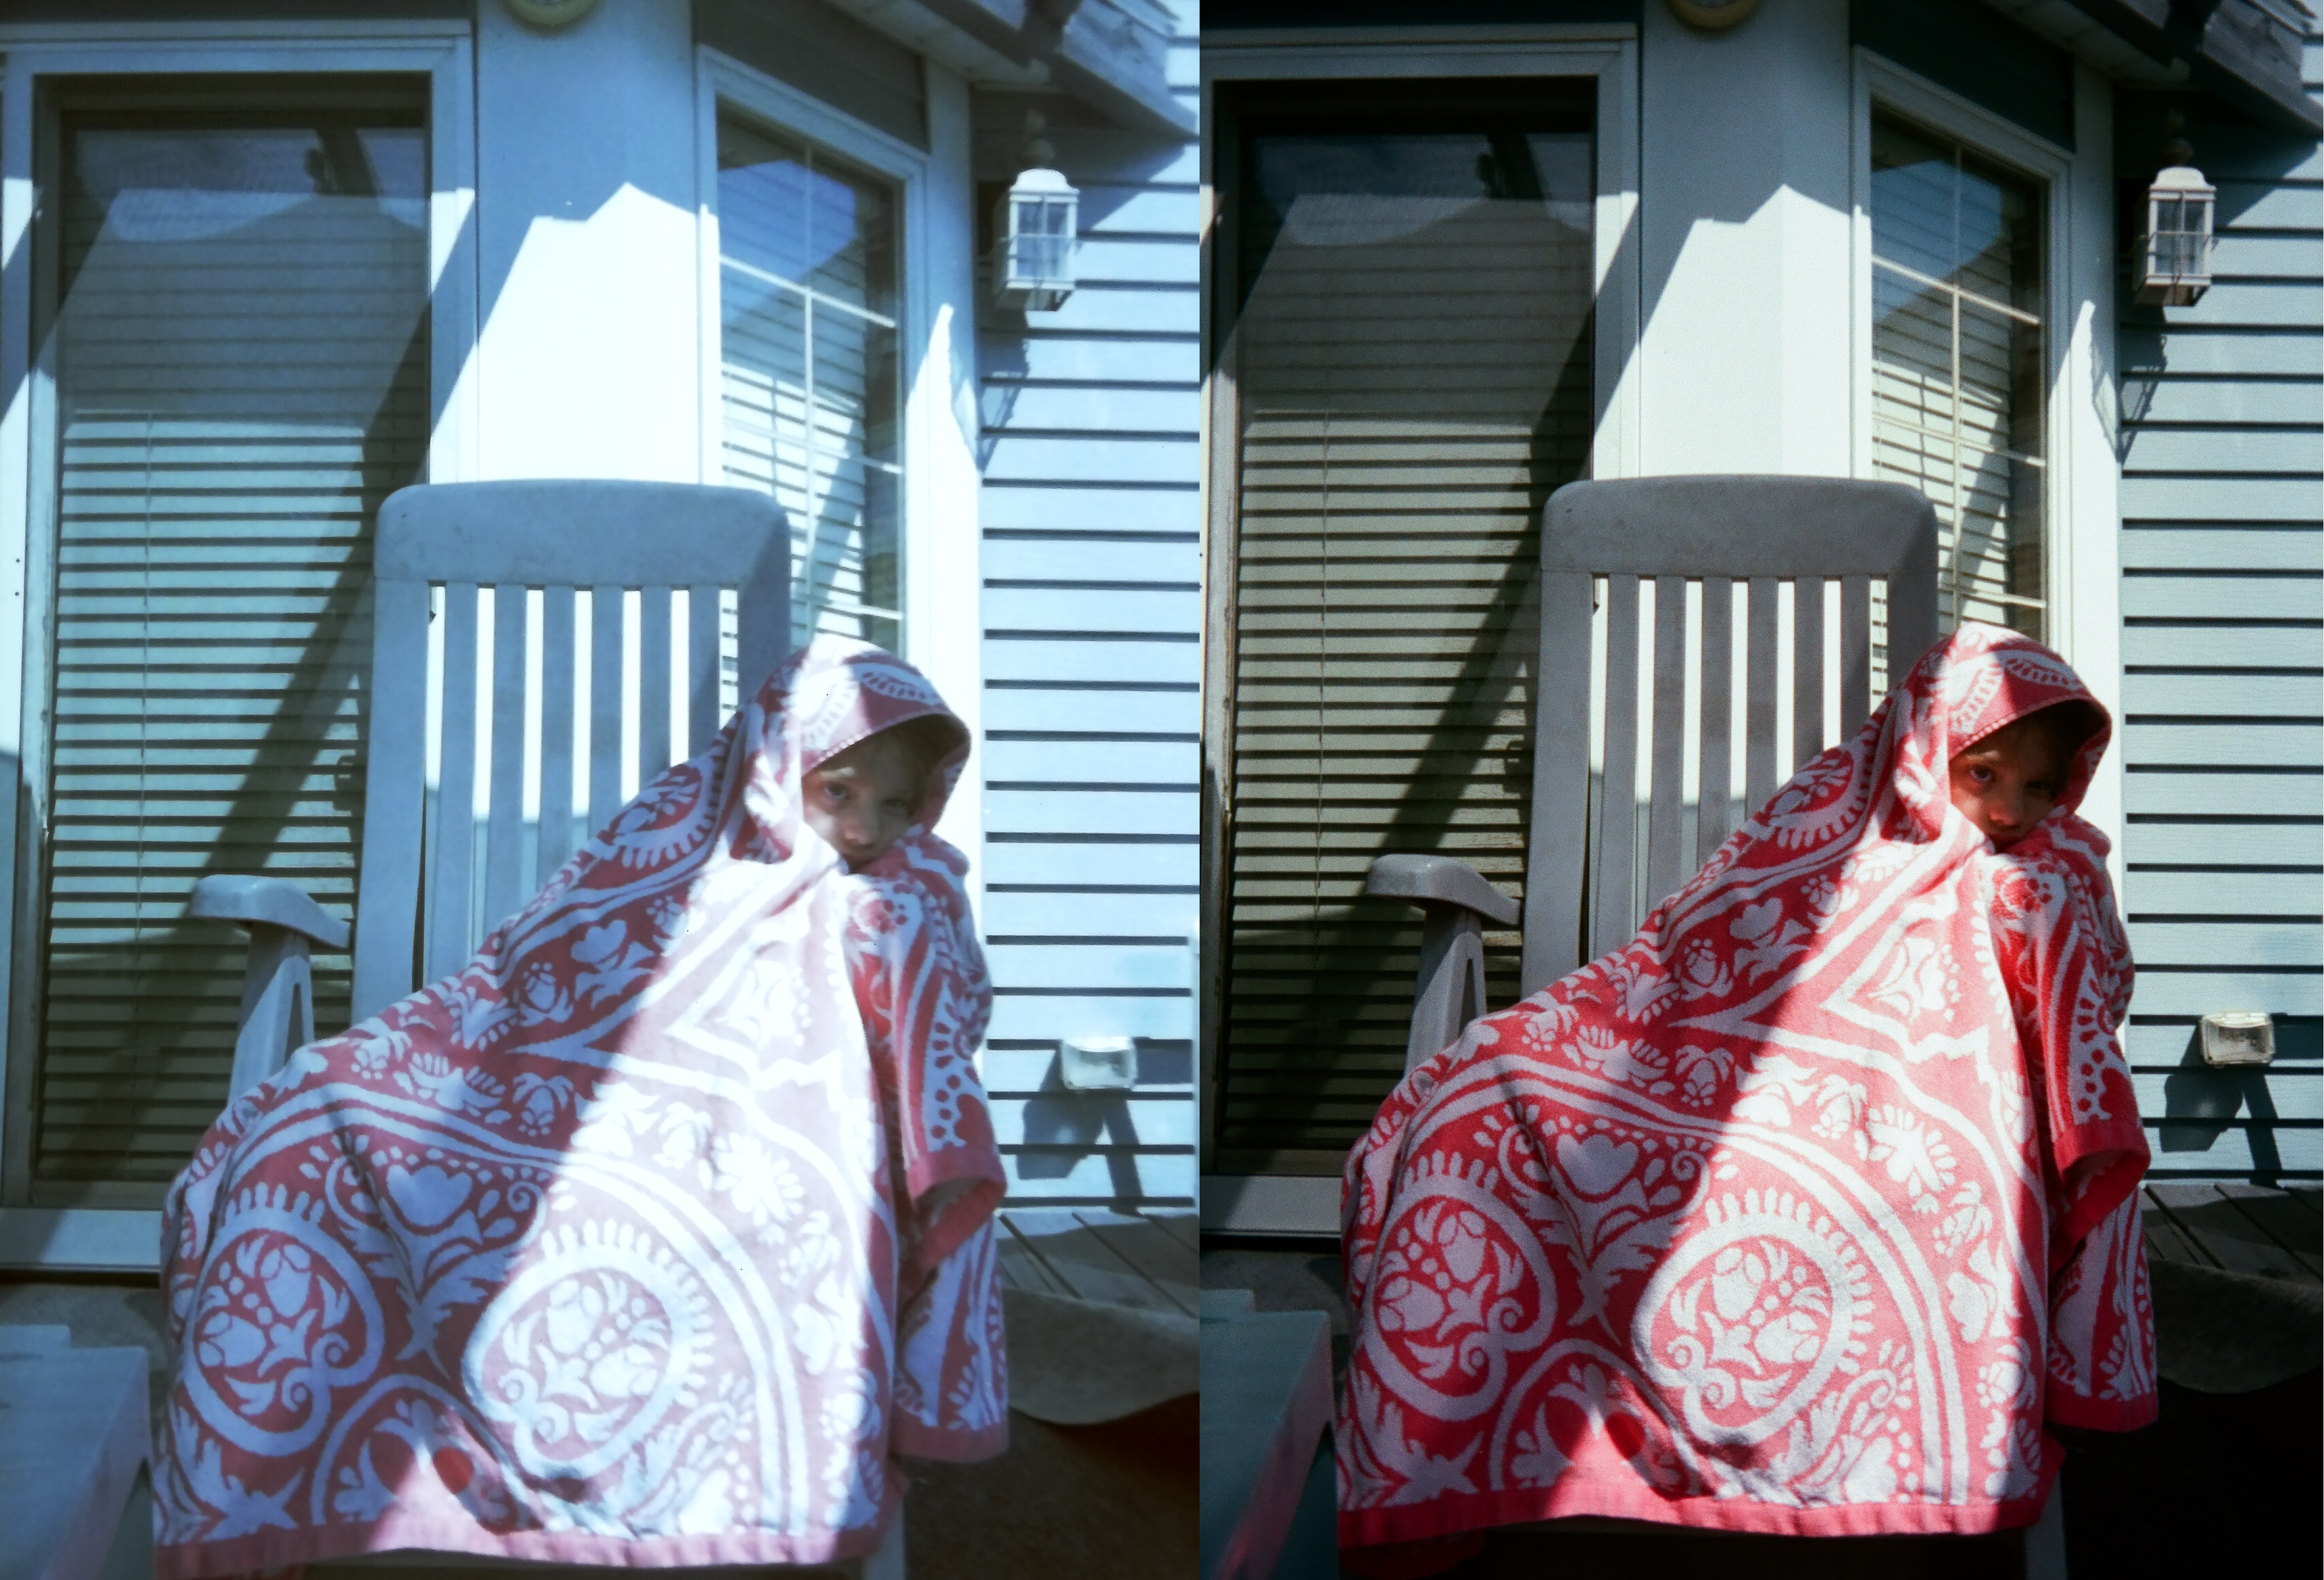
In my opinion, the Slide n Scan is struggling here with color depth. The lab scan (on the right) is so much richer and has pulled warmth from the gray-blue background elements. Maybe don’t feed your Portra beauties through this scanner (unless this is the look you want, of course).
Overall, though, this is basically what I expected a mass-market, quick-scanning negative scanner to produce. And it reassures me that the fee I pay to the Darkroom to scan my negatives is producing way better results than I could at home with this equipment. This experiment helped me set expectations - the Slide n Scan will produce something usable, but the negatives likely contain additional details and beauty that could be captured in the future with a higher-end scanner.
This experiment helped me proceed with confidence, and hopefully it helps you decide which quality of scanner will meet YOUR project’s needs.
More sample scans from the Slide n Scan
These negatives were shot 1980-2000. They are a representative sample of the film I scanned in this project. There is no post-processing on them.

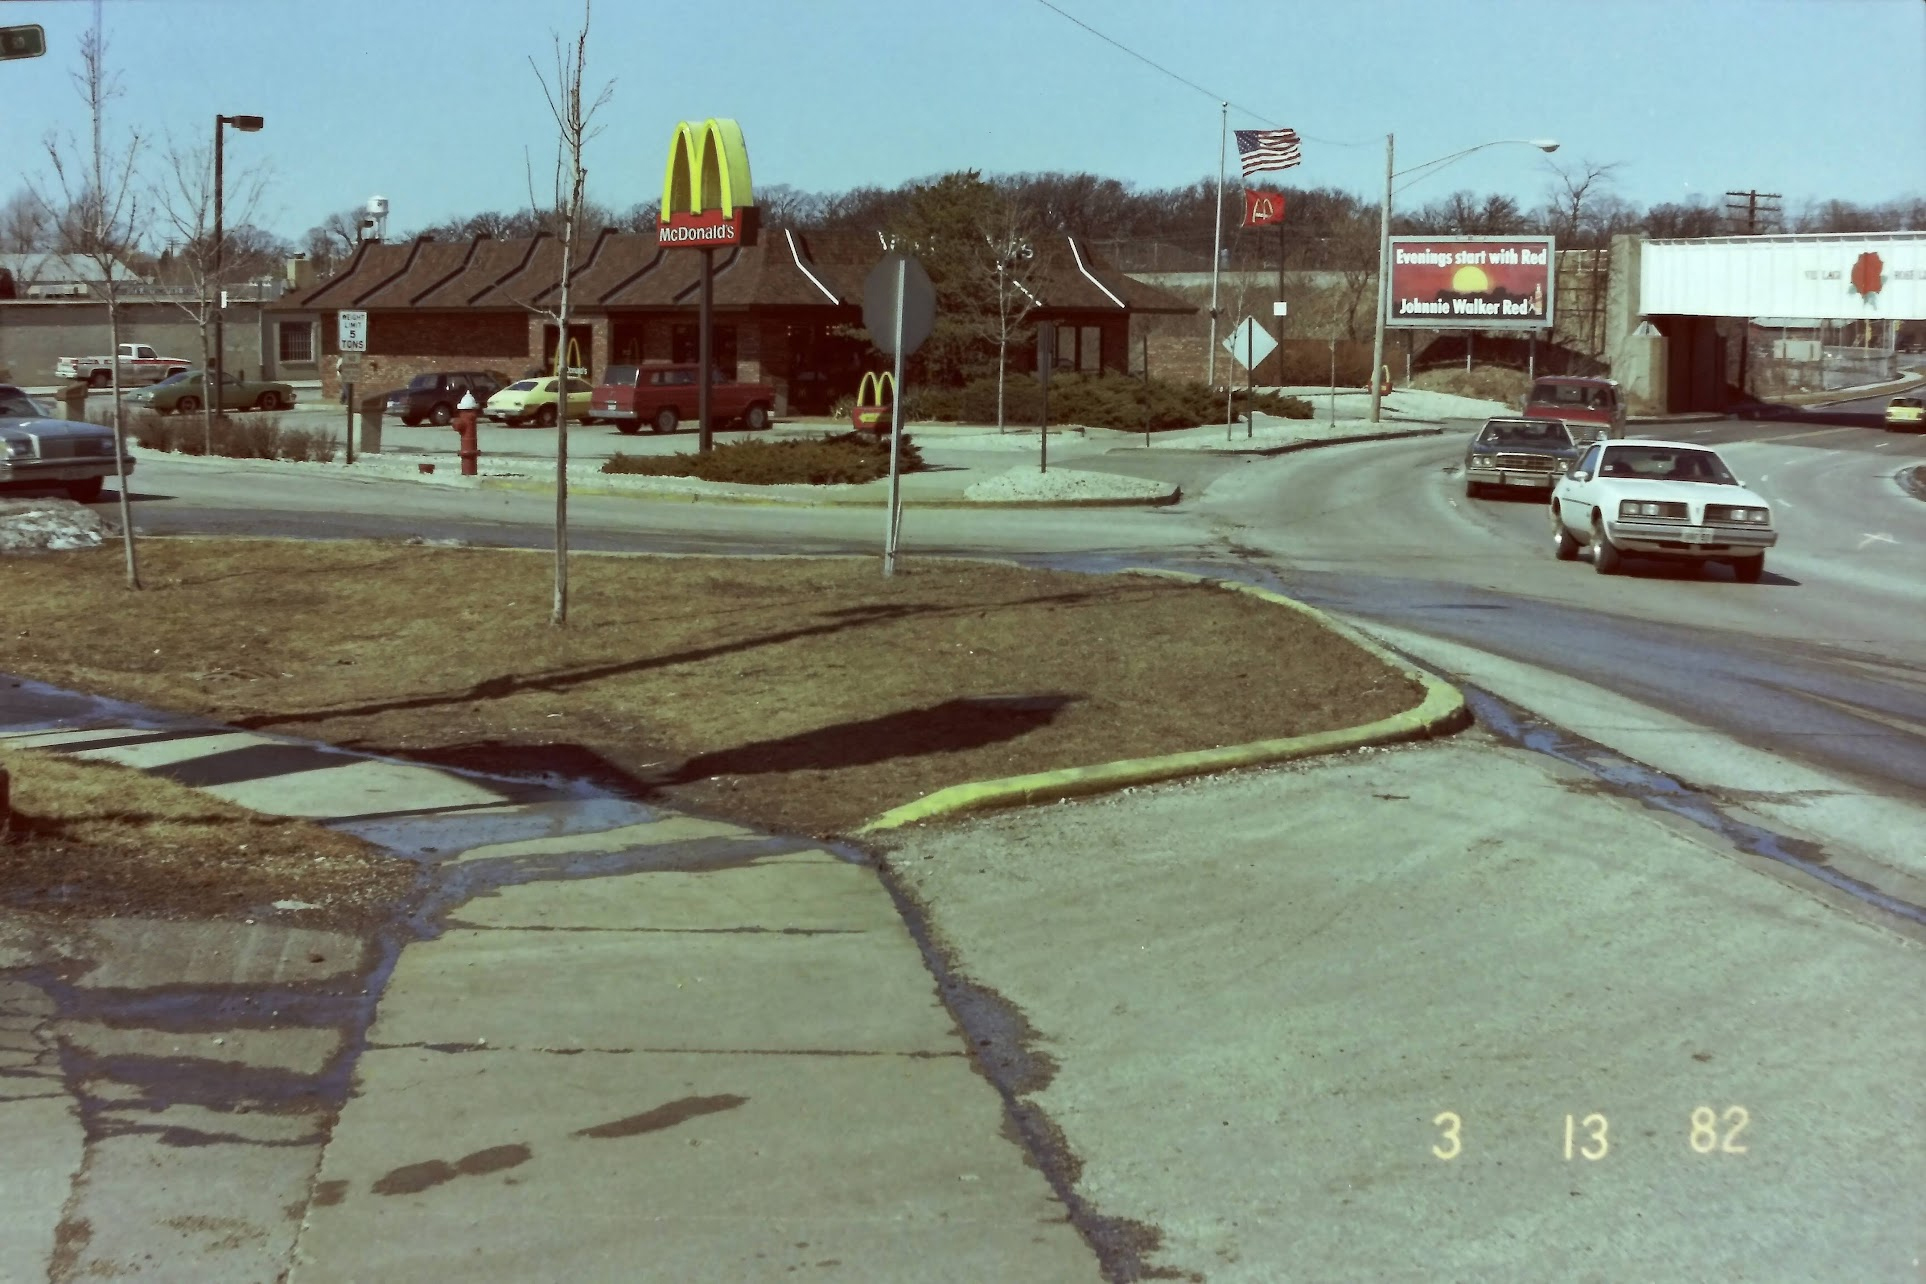

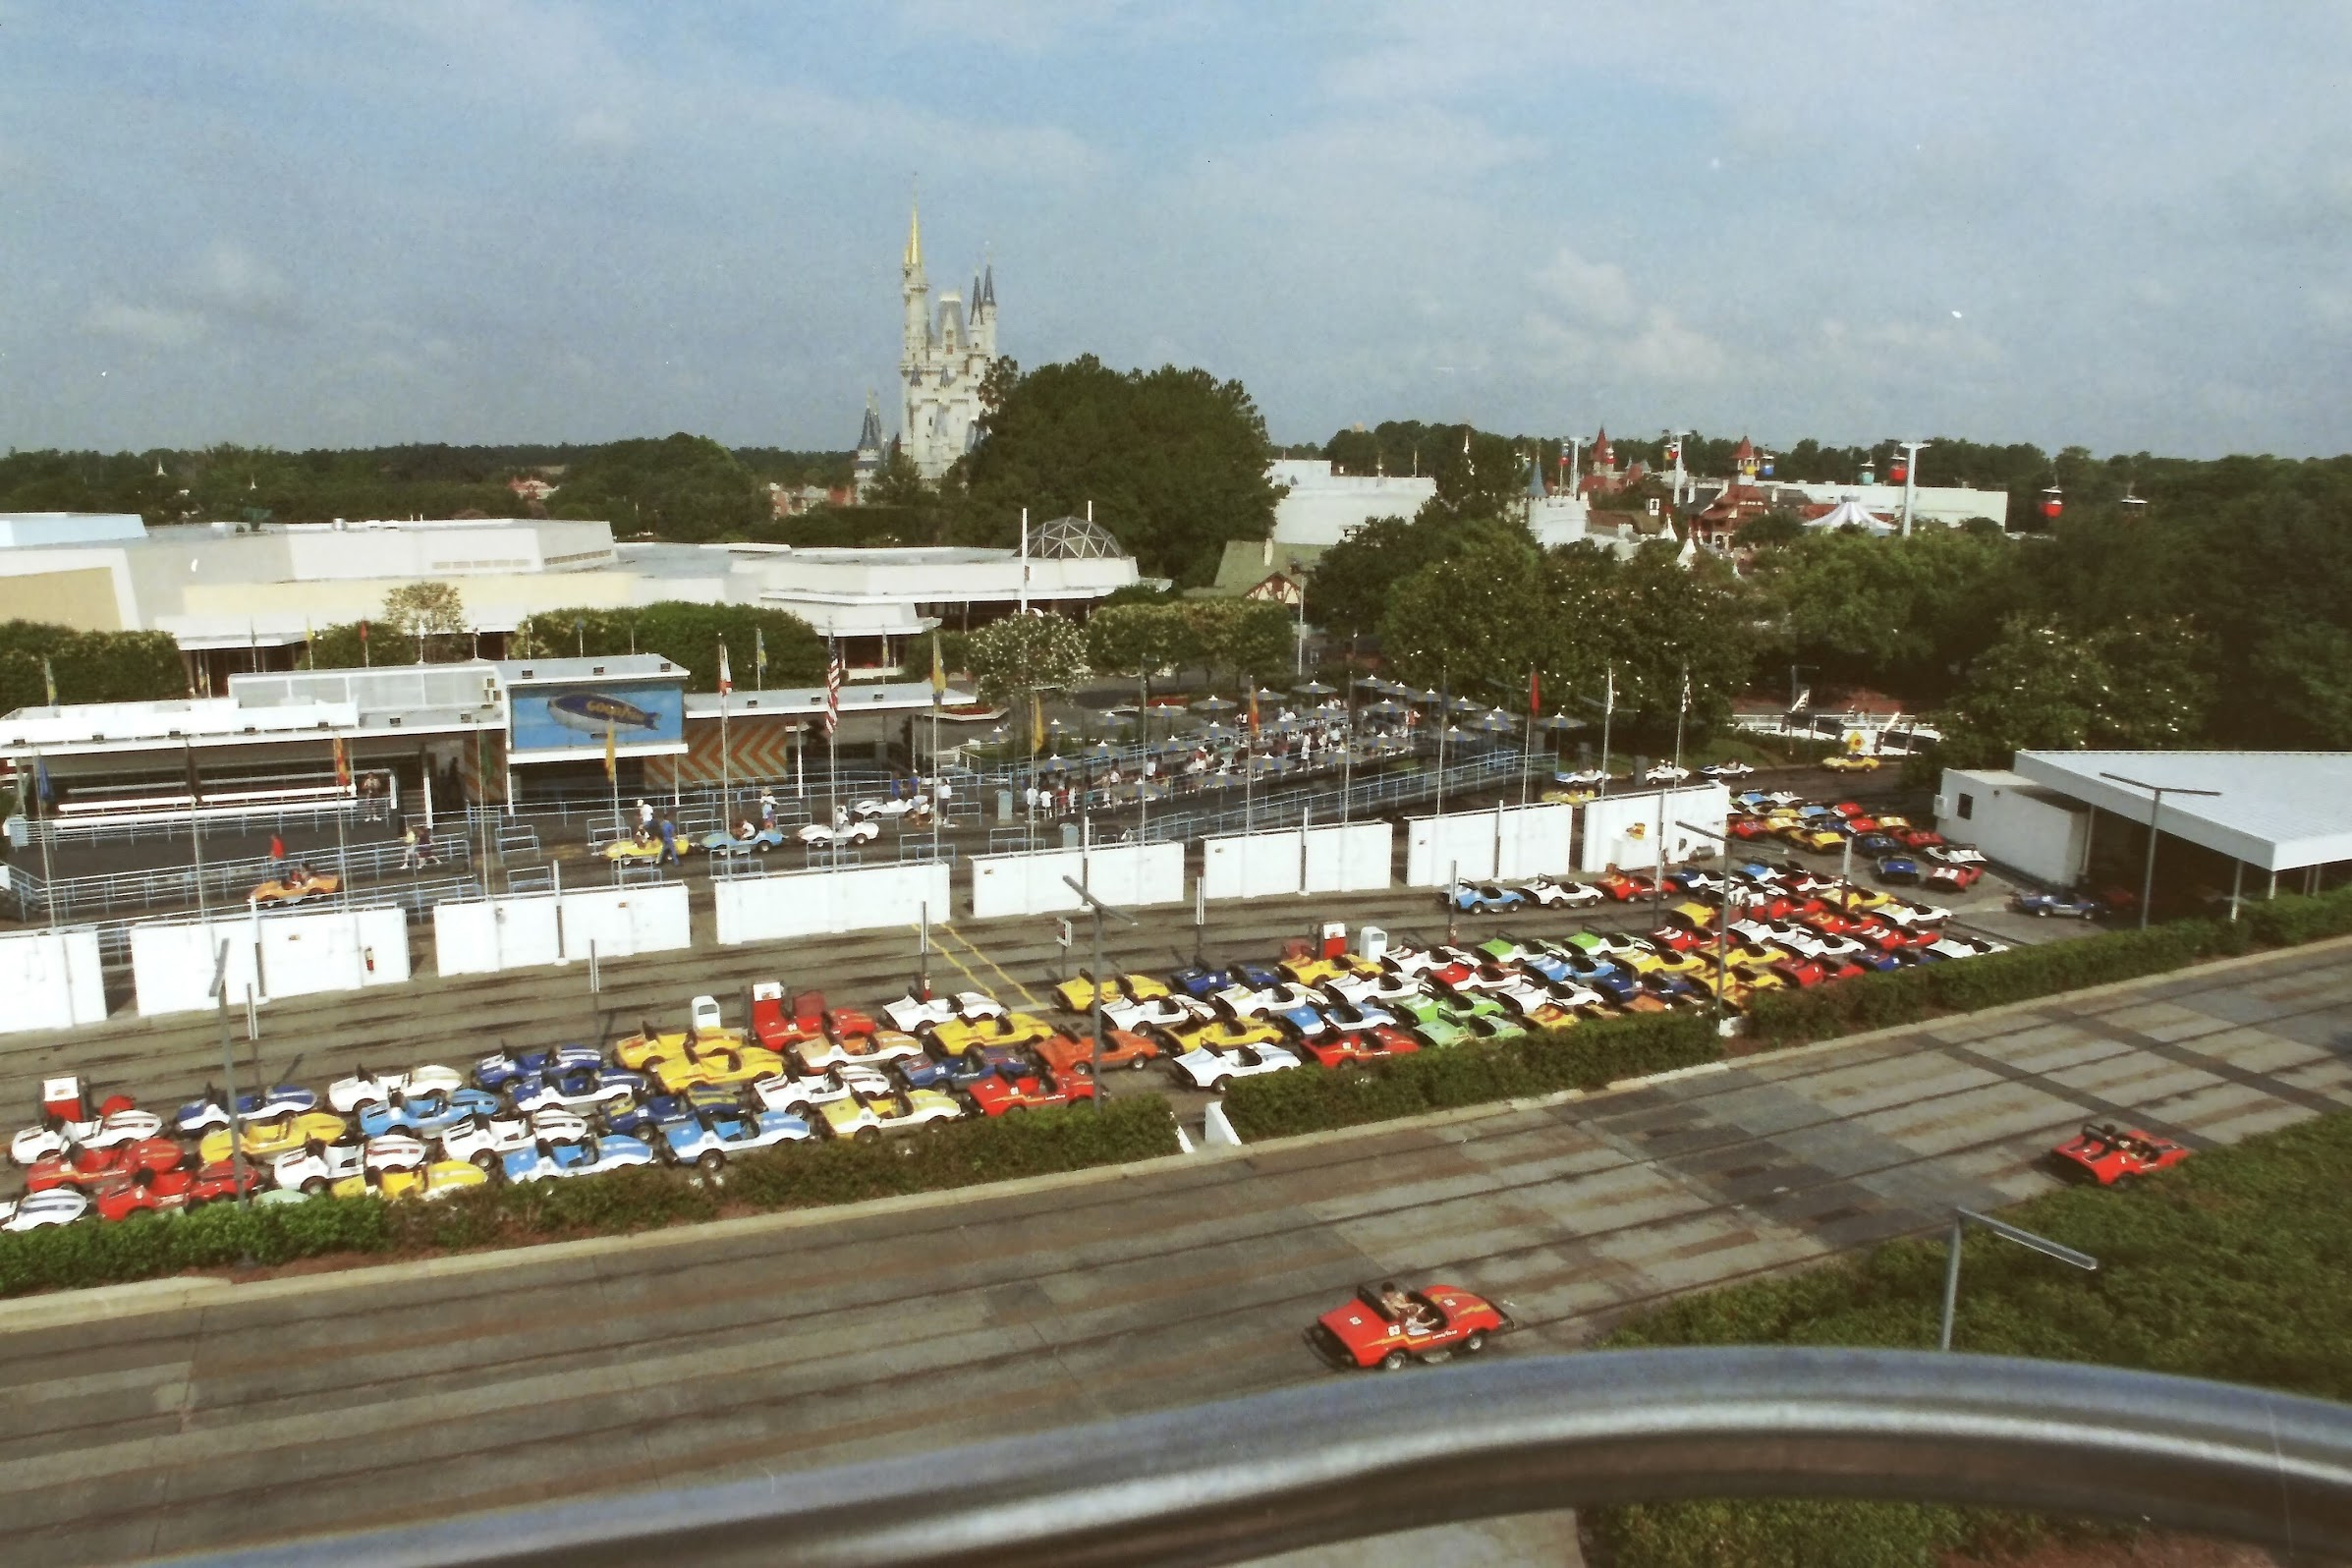


It’s good to keep expectations reasonable here. The cameras that took these photos were meant for 4x6" snapshots of everyday life. Many of these pics came from plastic disposable cameras. These pics were not meant to be scrutinized on backlit, high-res screens decades later.
I have not printed any of these scans, but I think 4x6" prints of these scans would turn out equivalent to how they would’ve looked if printed in the 80s/90s. I will update this post if I do print any of them.
Scanning and organizing the negatives
Confident that I had the right scanner for the job, I began the daunting task of sorting through 1000+ negatives spanning roughly 1968-2003. This was the first box:
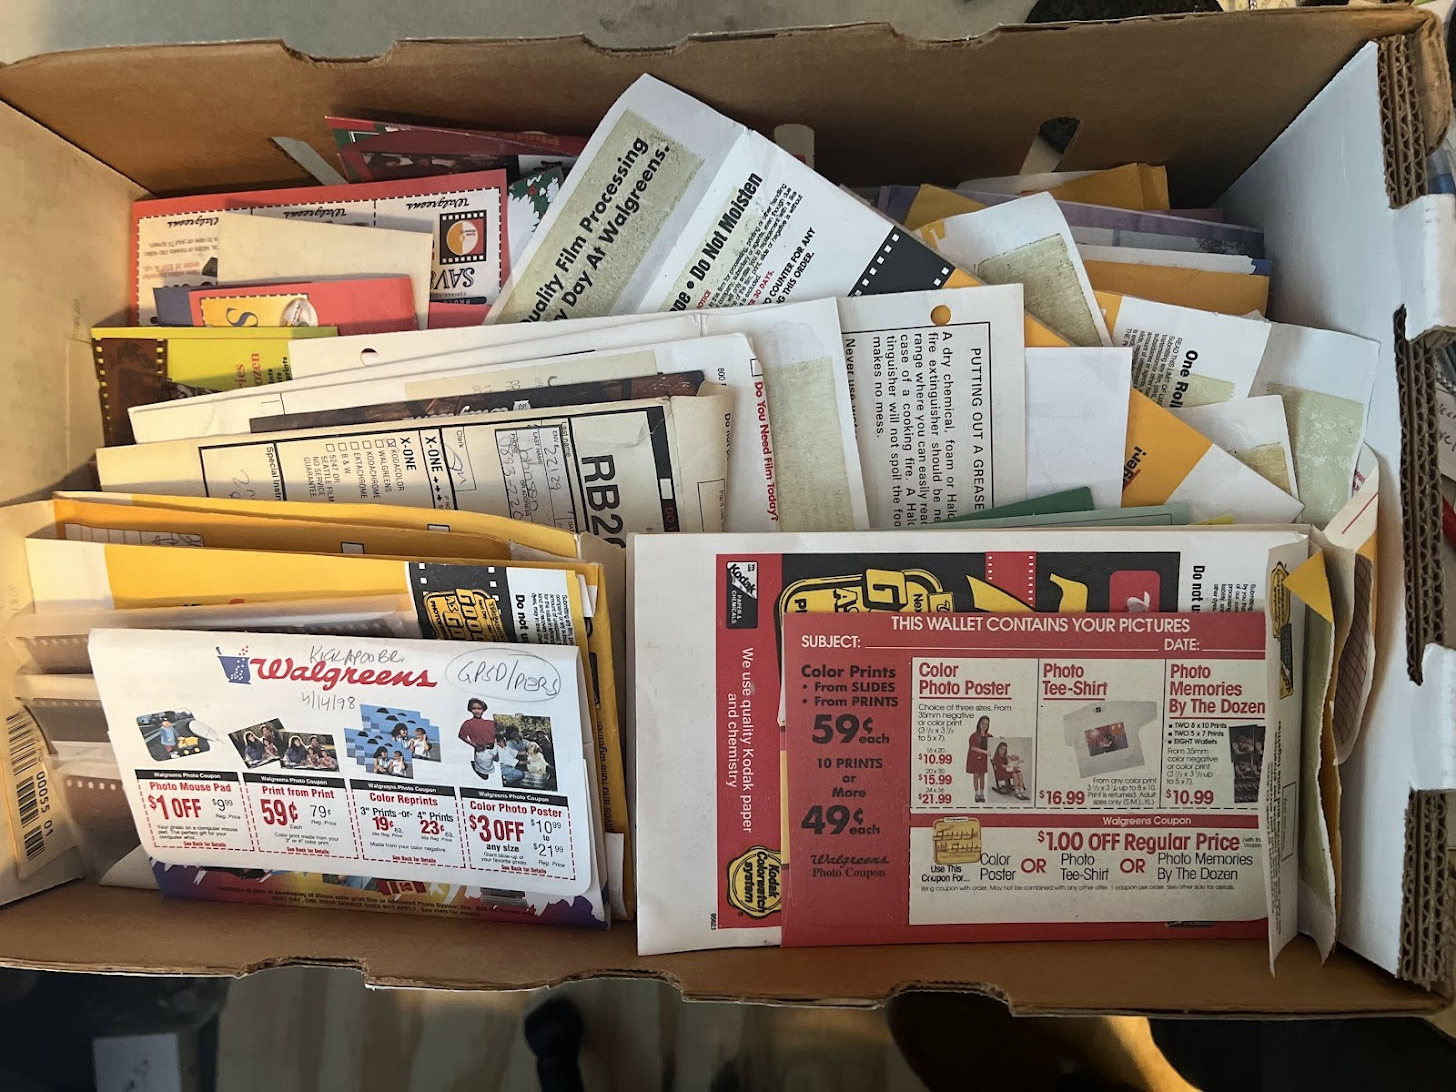
Sorting the box (on a huge table)
I kept negatives in their sleeves but grouped them by film type. I dedicated a table to this sorting effort.
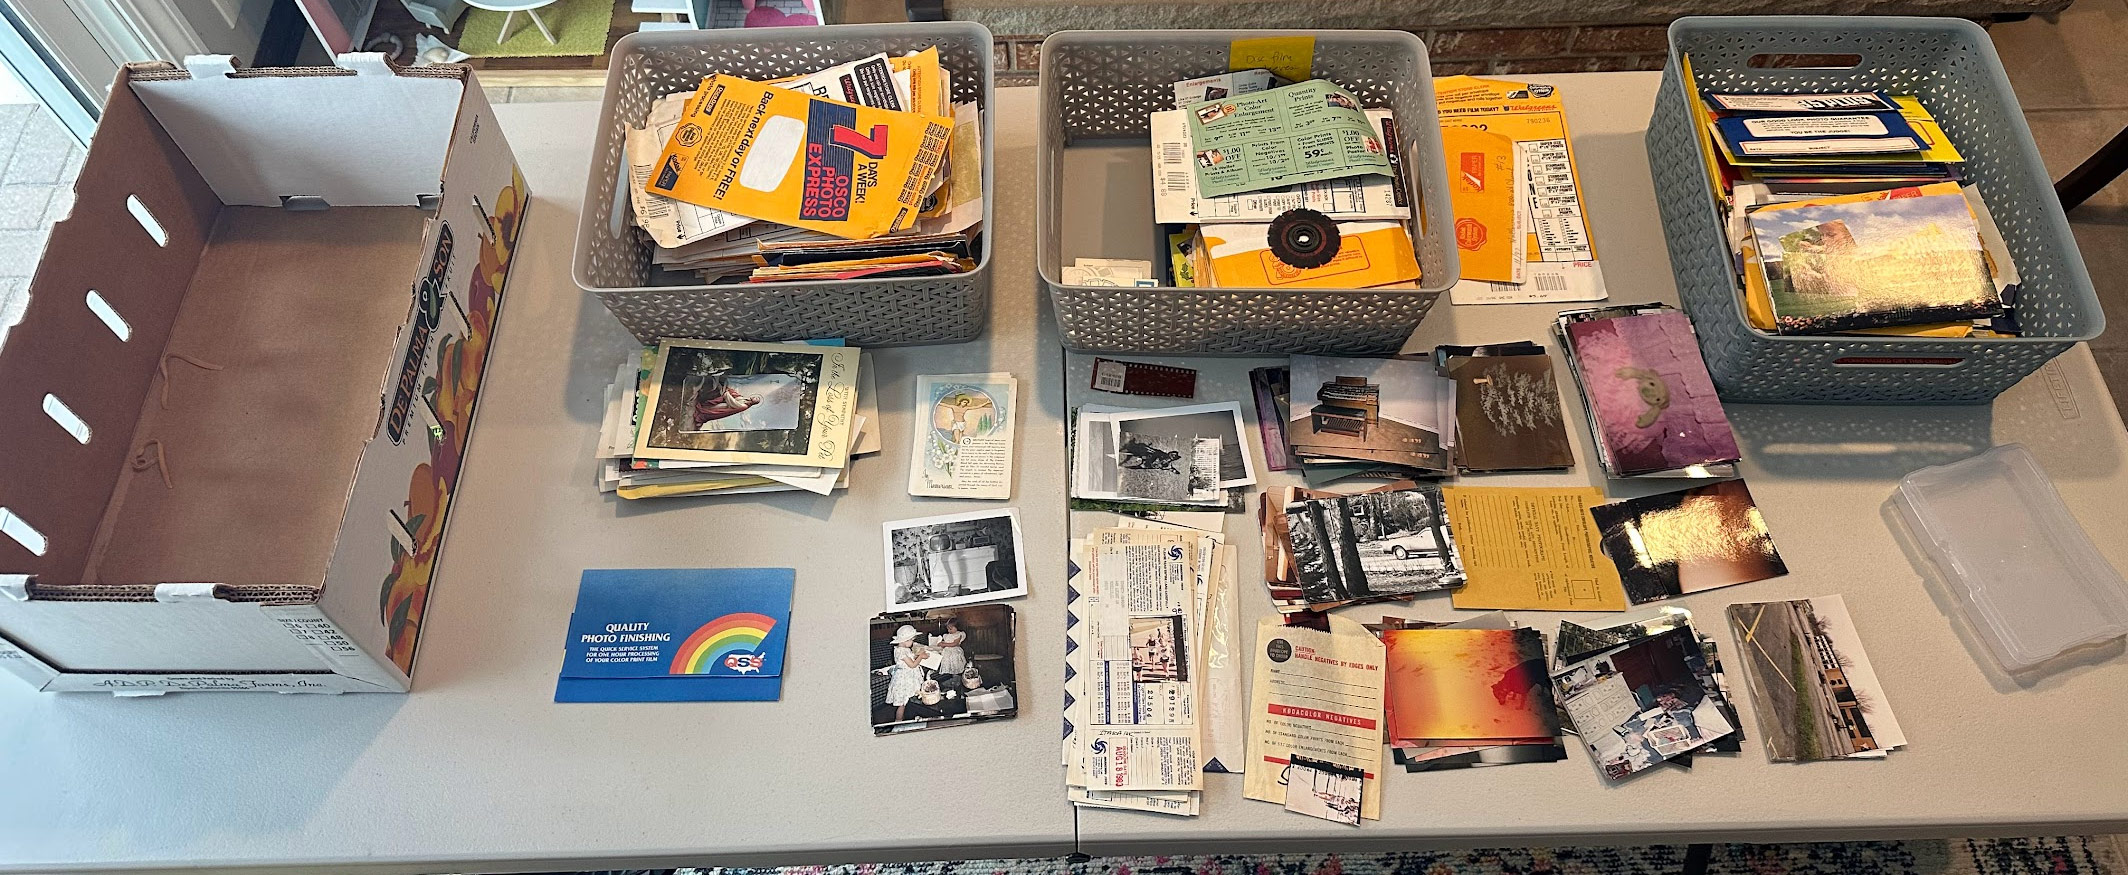 (This picture was taken before 2 more large boxes of negatives and prints were delivered to my house by family members eager to have it ALL scanned)
Scanning the negatives
My box of negatives contained these film formats:
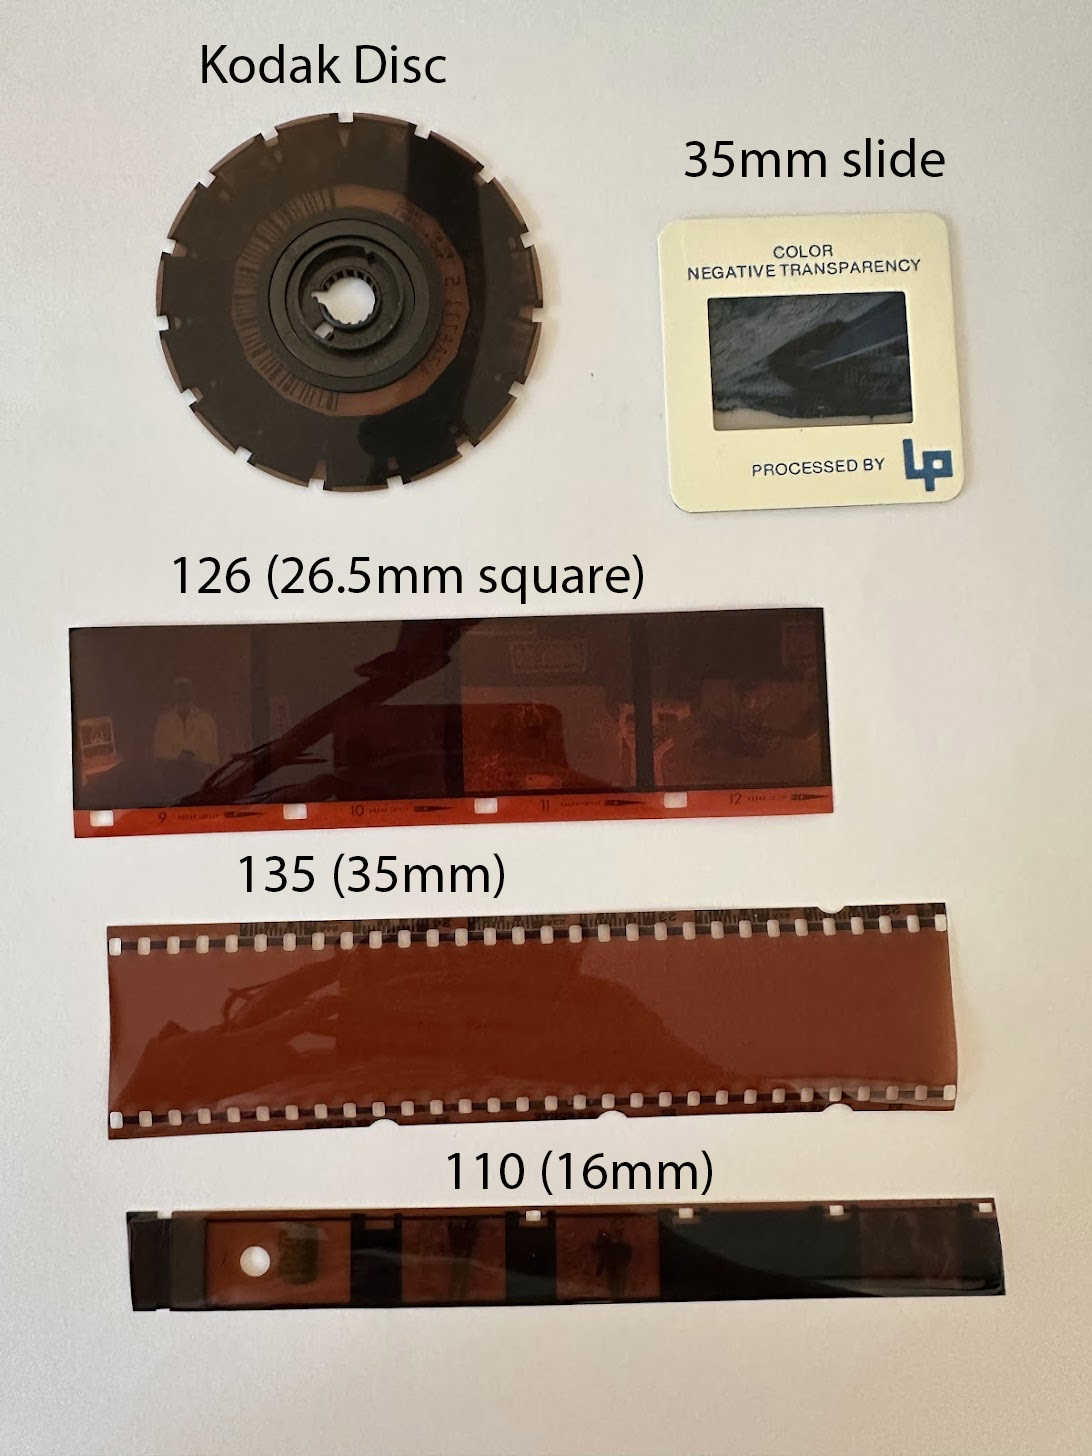
- 35mm (1980s-2000s)
- 35mm slide
- 120 (1960s-1970s)
- 110 (1990s)
- Kodak disc film (1980s-90s)
All of these formats could be scanned with the Slide n Scan except the disc format (more on that later).
Scanning workflow
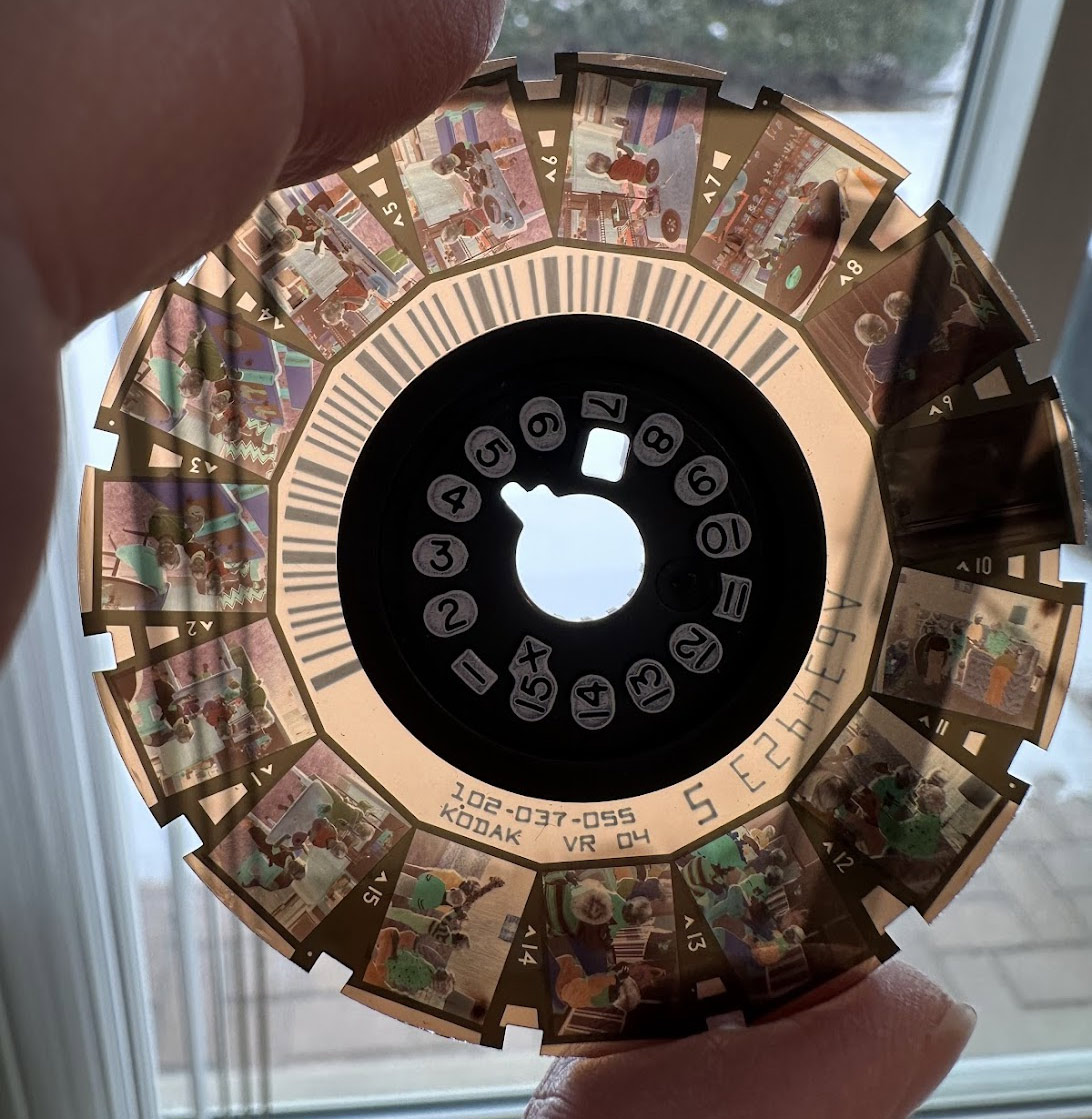
- Place the film negative in the adapter
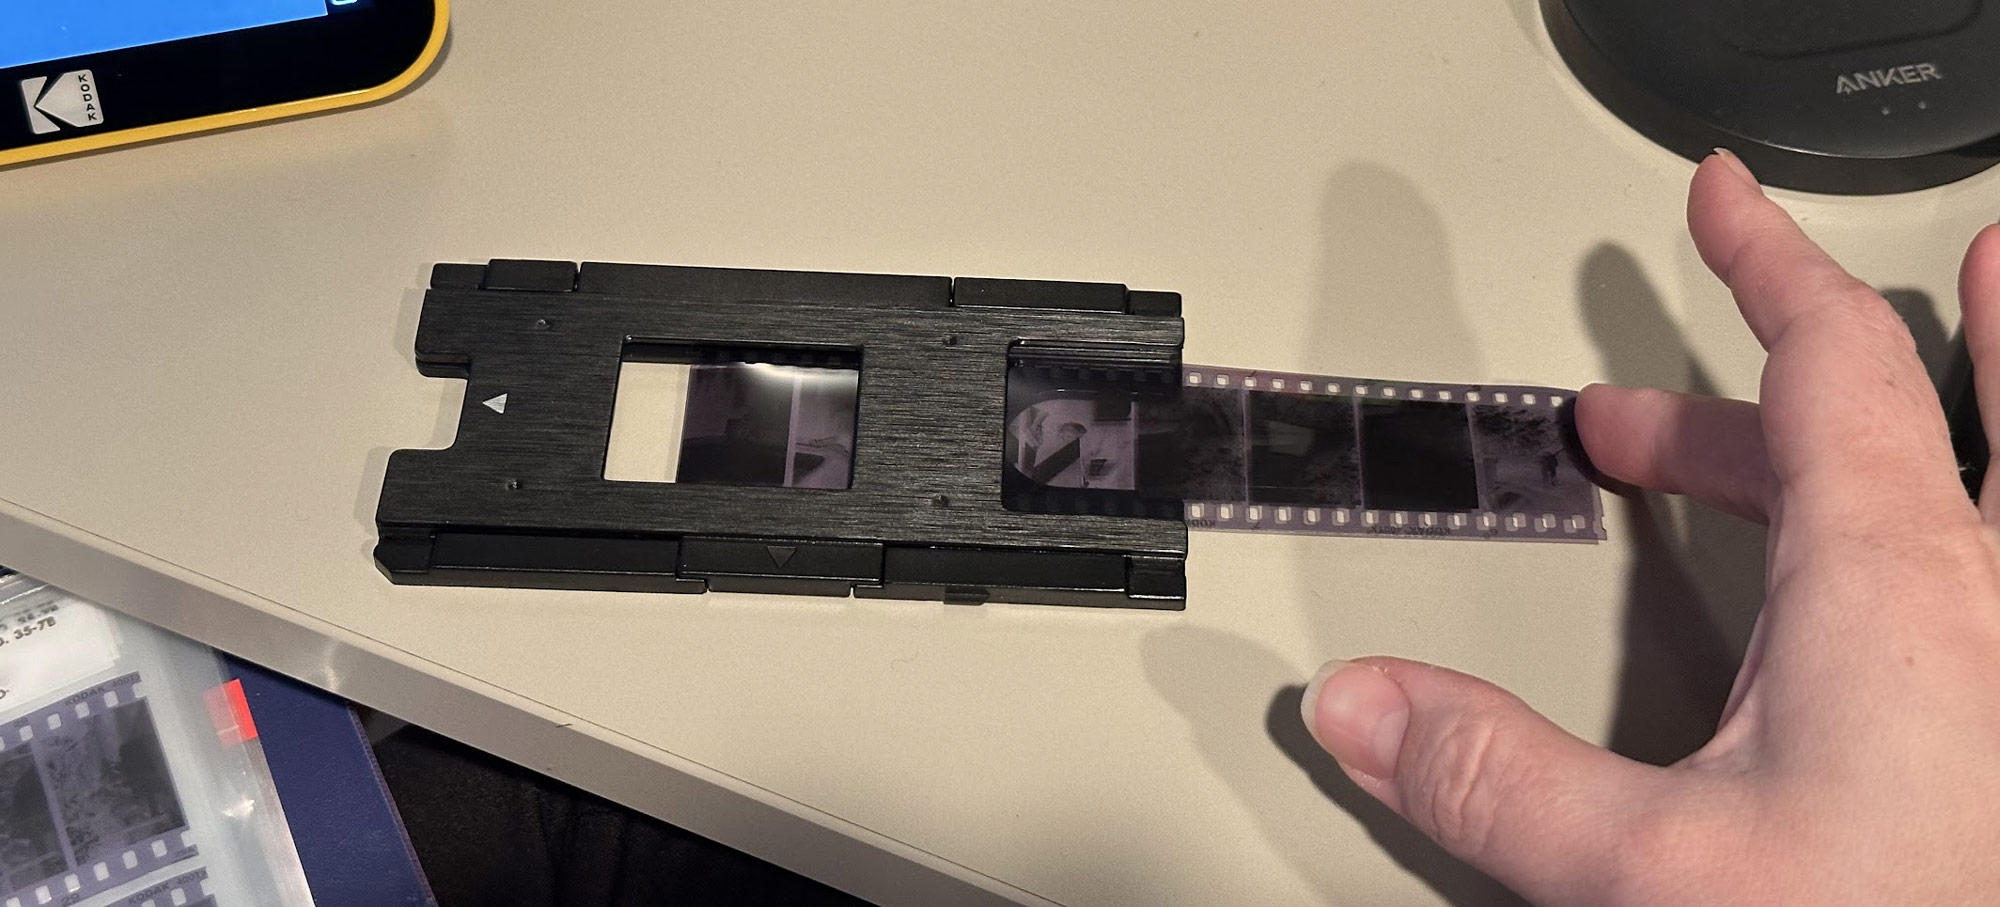
- Position the first frame of it in the scanner’s preview
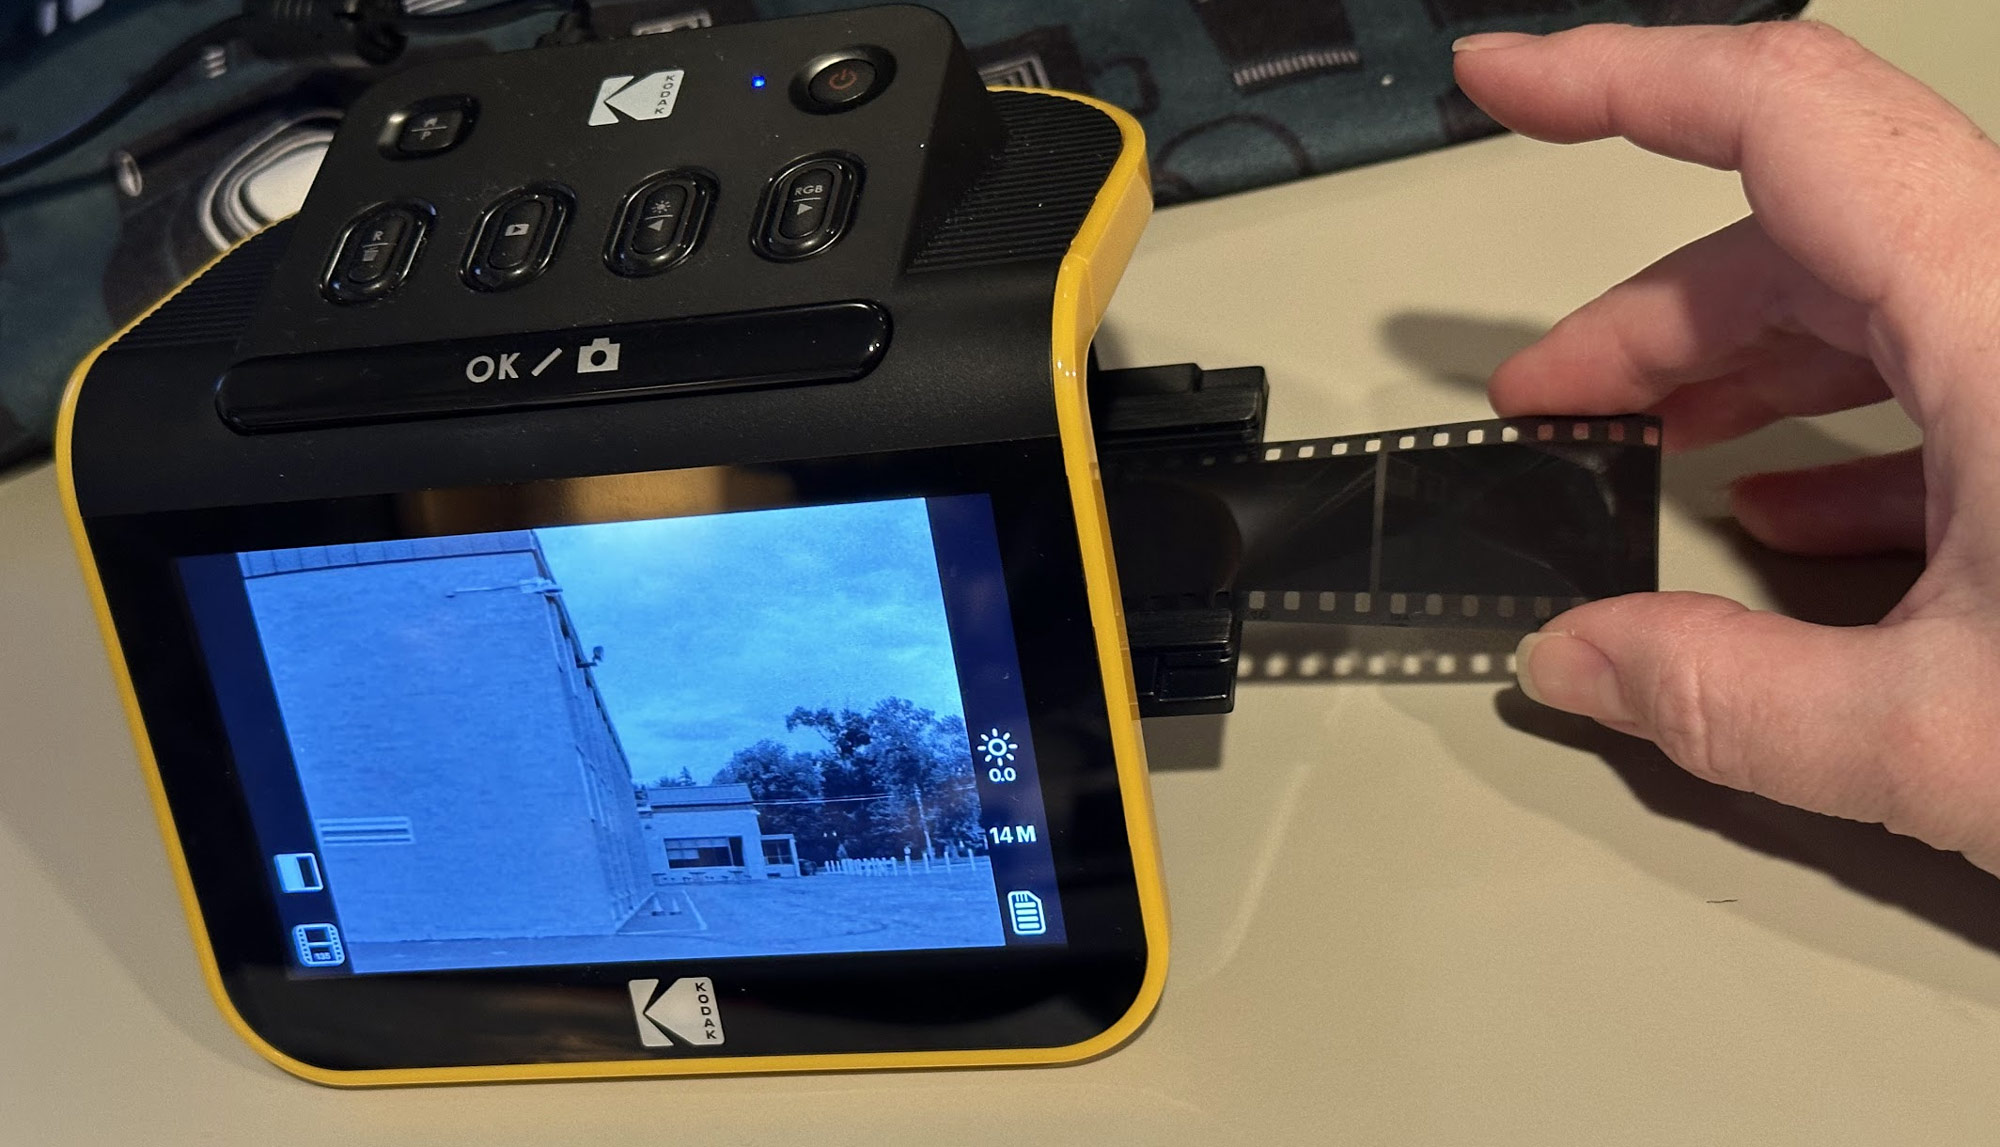
- Optional: adjust red/green/blue and/or brightness in the scanner itself (occasionally useful)
- Press the big button to save a scan of the frame
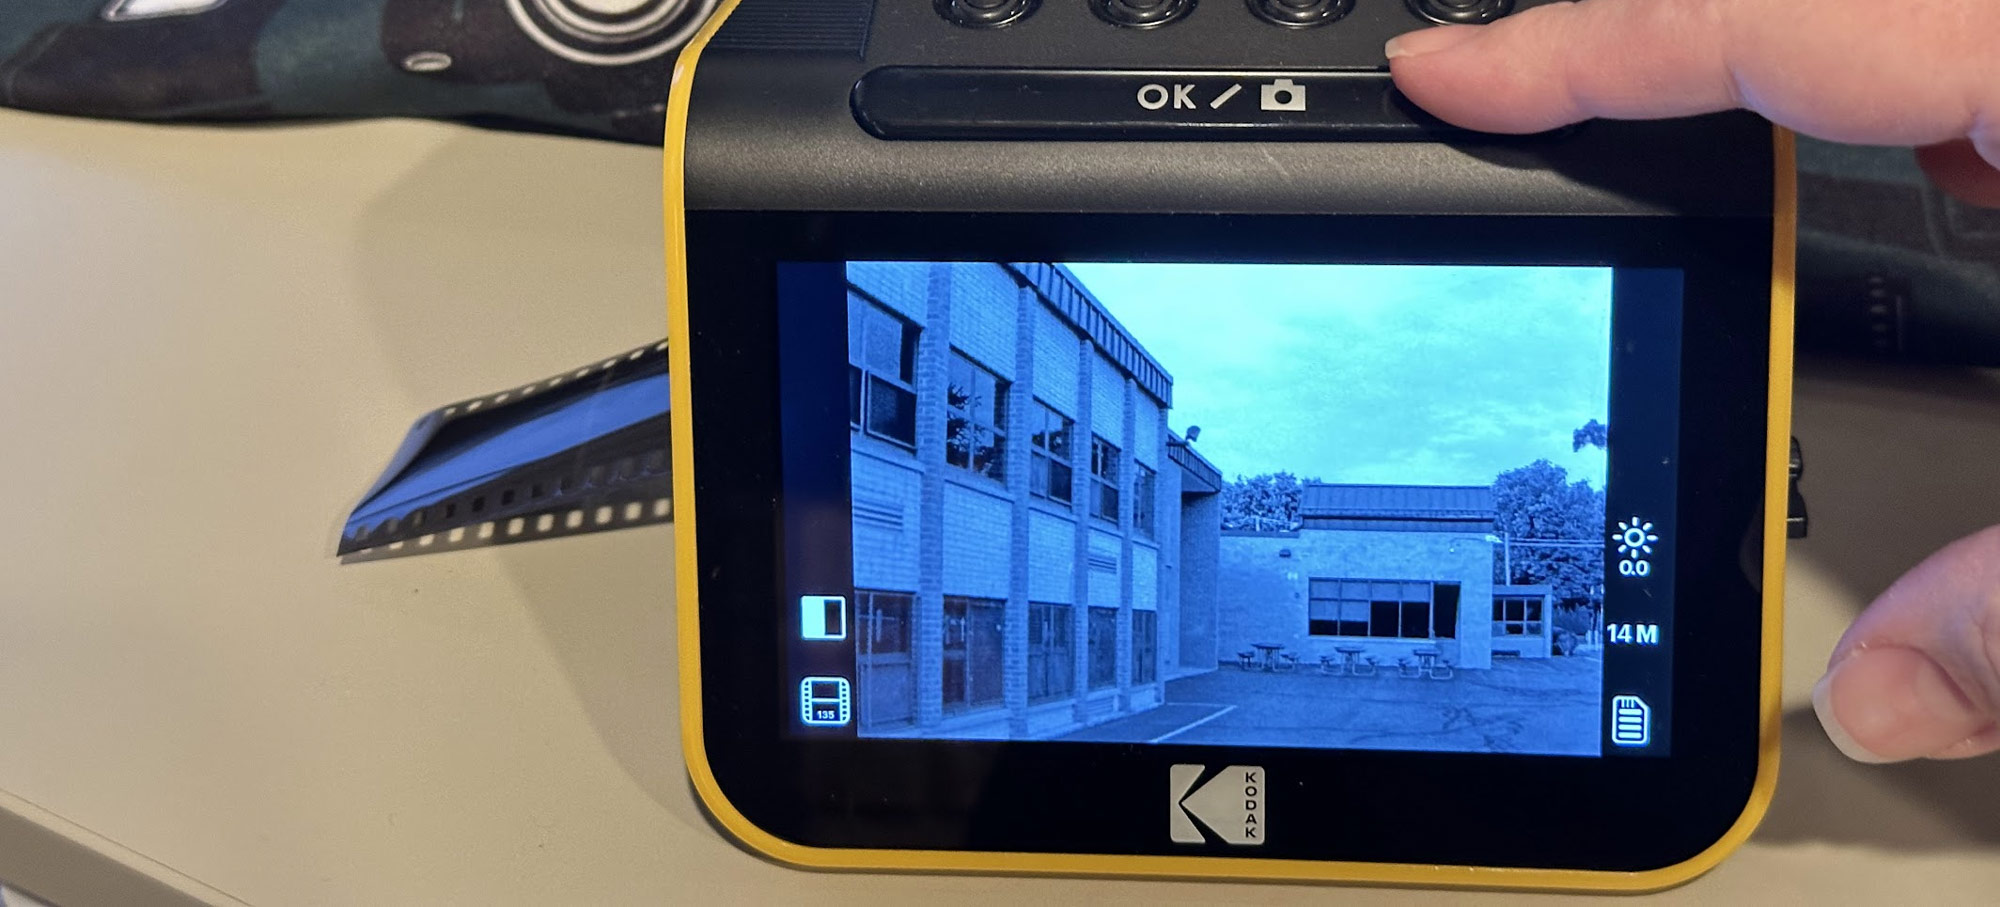
- (repeat for the rest of the roll)
- Take a blank image before starting the next roll (the orange “sentinels” can be deleted later, they’re just there to help you distinguish rolls once you’re working on your computer)
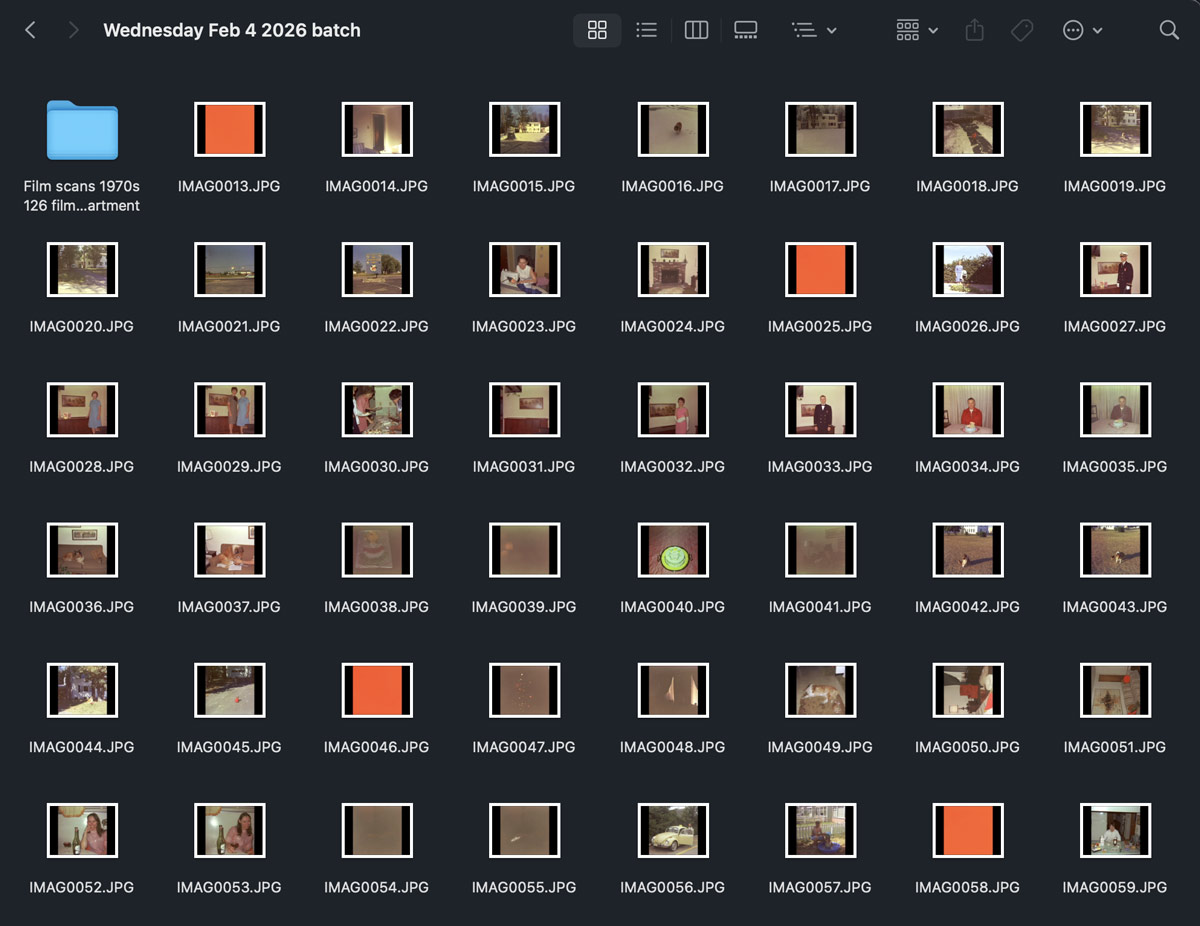
- Scan a good 200-300 before taking the SD card out, and treat those images as a batch
This process works for 35mm film, 110 film, and 120 film. Disc film was its own story.
Disc film
 What an unusual film format! This was a popular format in the 1980s and early 90s and most of the photos of my childhood are on this format film.
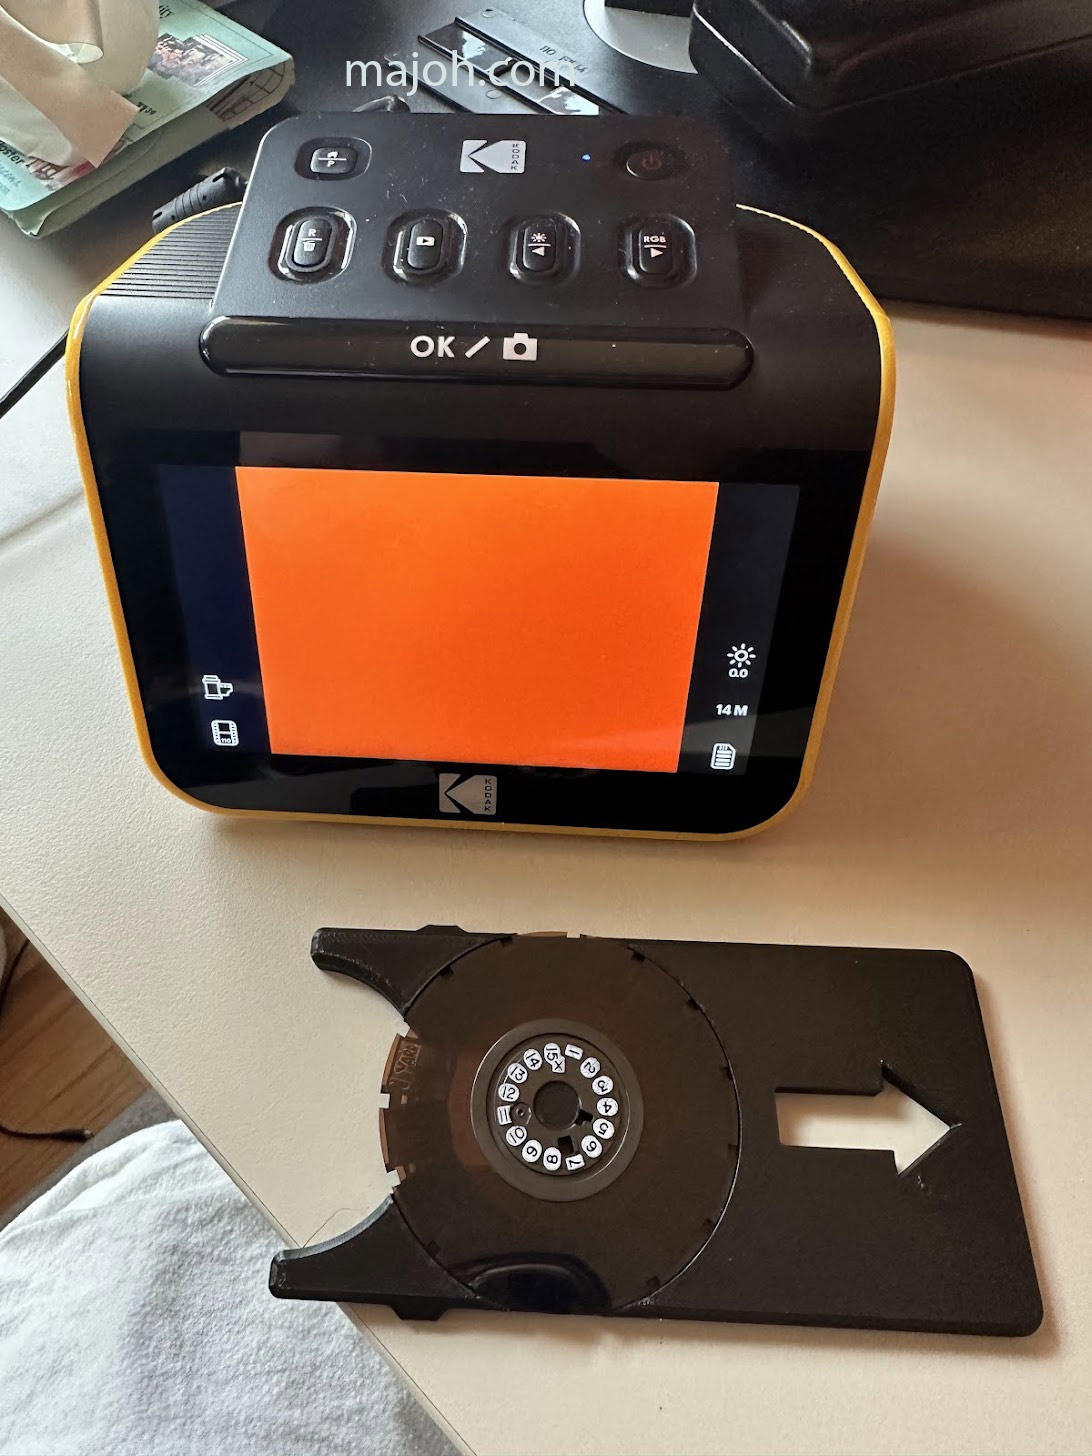
Unfortunately, the Slide n Scan does not include an adapter for disc film. I bought a 3d-printed adapter from “Colebri” (on Etsy and Amazon).
I also had to do some post-processing steps to crop them, which I used Photoshop for.
Scanning a disc:
- Press the disc film onto the adapter’s spindle (press hard, it will audibly snap into place)
- Push the adapter into the left side of the scanner
- Select 110 as the format (this will leave a large white border around every image)
- Scan every frame, using your fingertip to rotate the disc for each shot
I did about 8-10 discs per batch.
Processing:
- Copy all the scanned photos to your computer
- In Photoshop, go to File -> Scripts -> Load Files into Stack
- Once all the images load, drag some guidelines down to frame the images (they will all use these same guide, so hopefully you were consistent in your positioning when scanning)
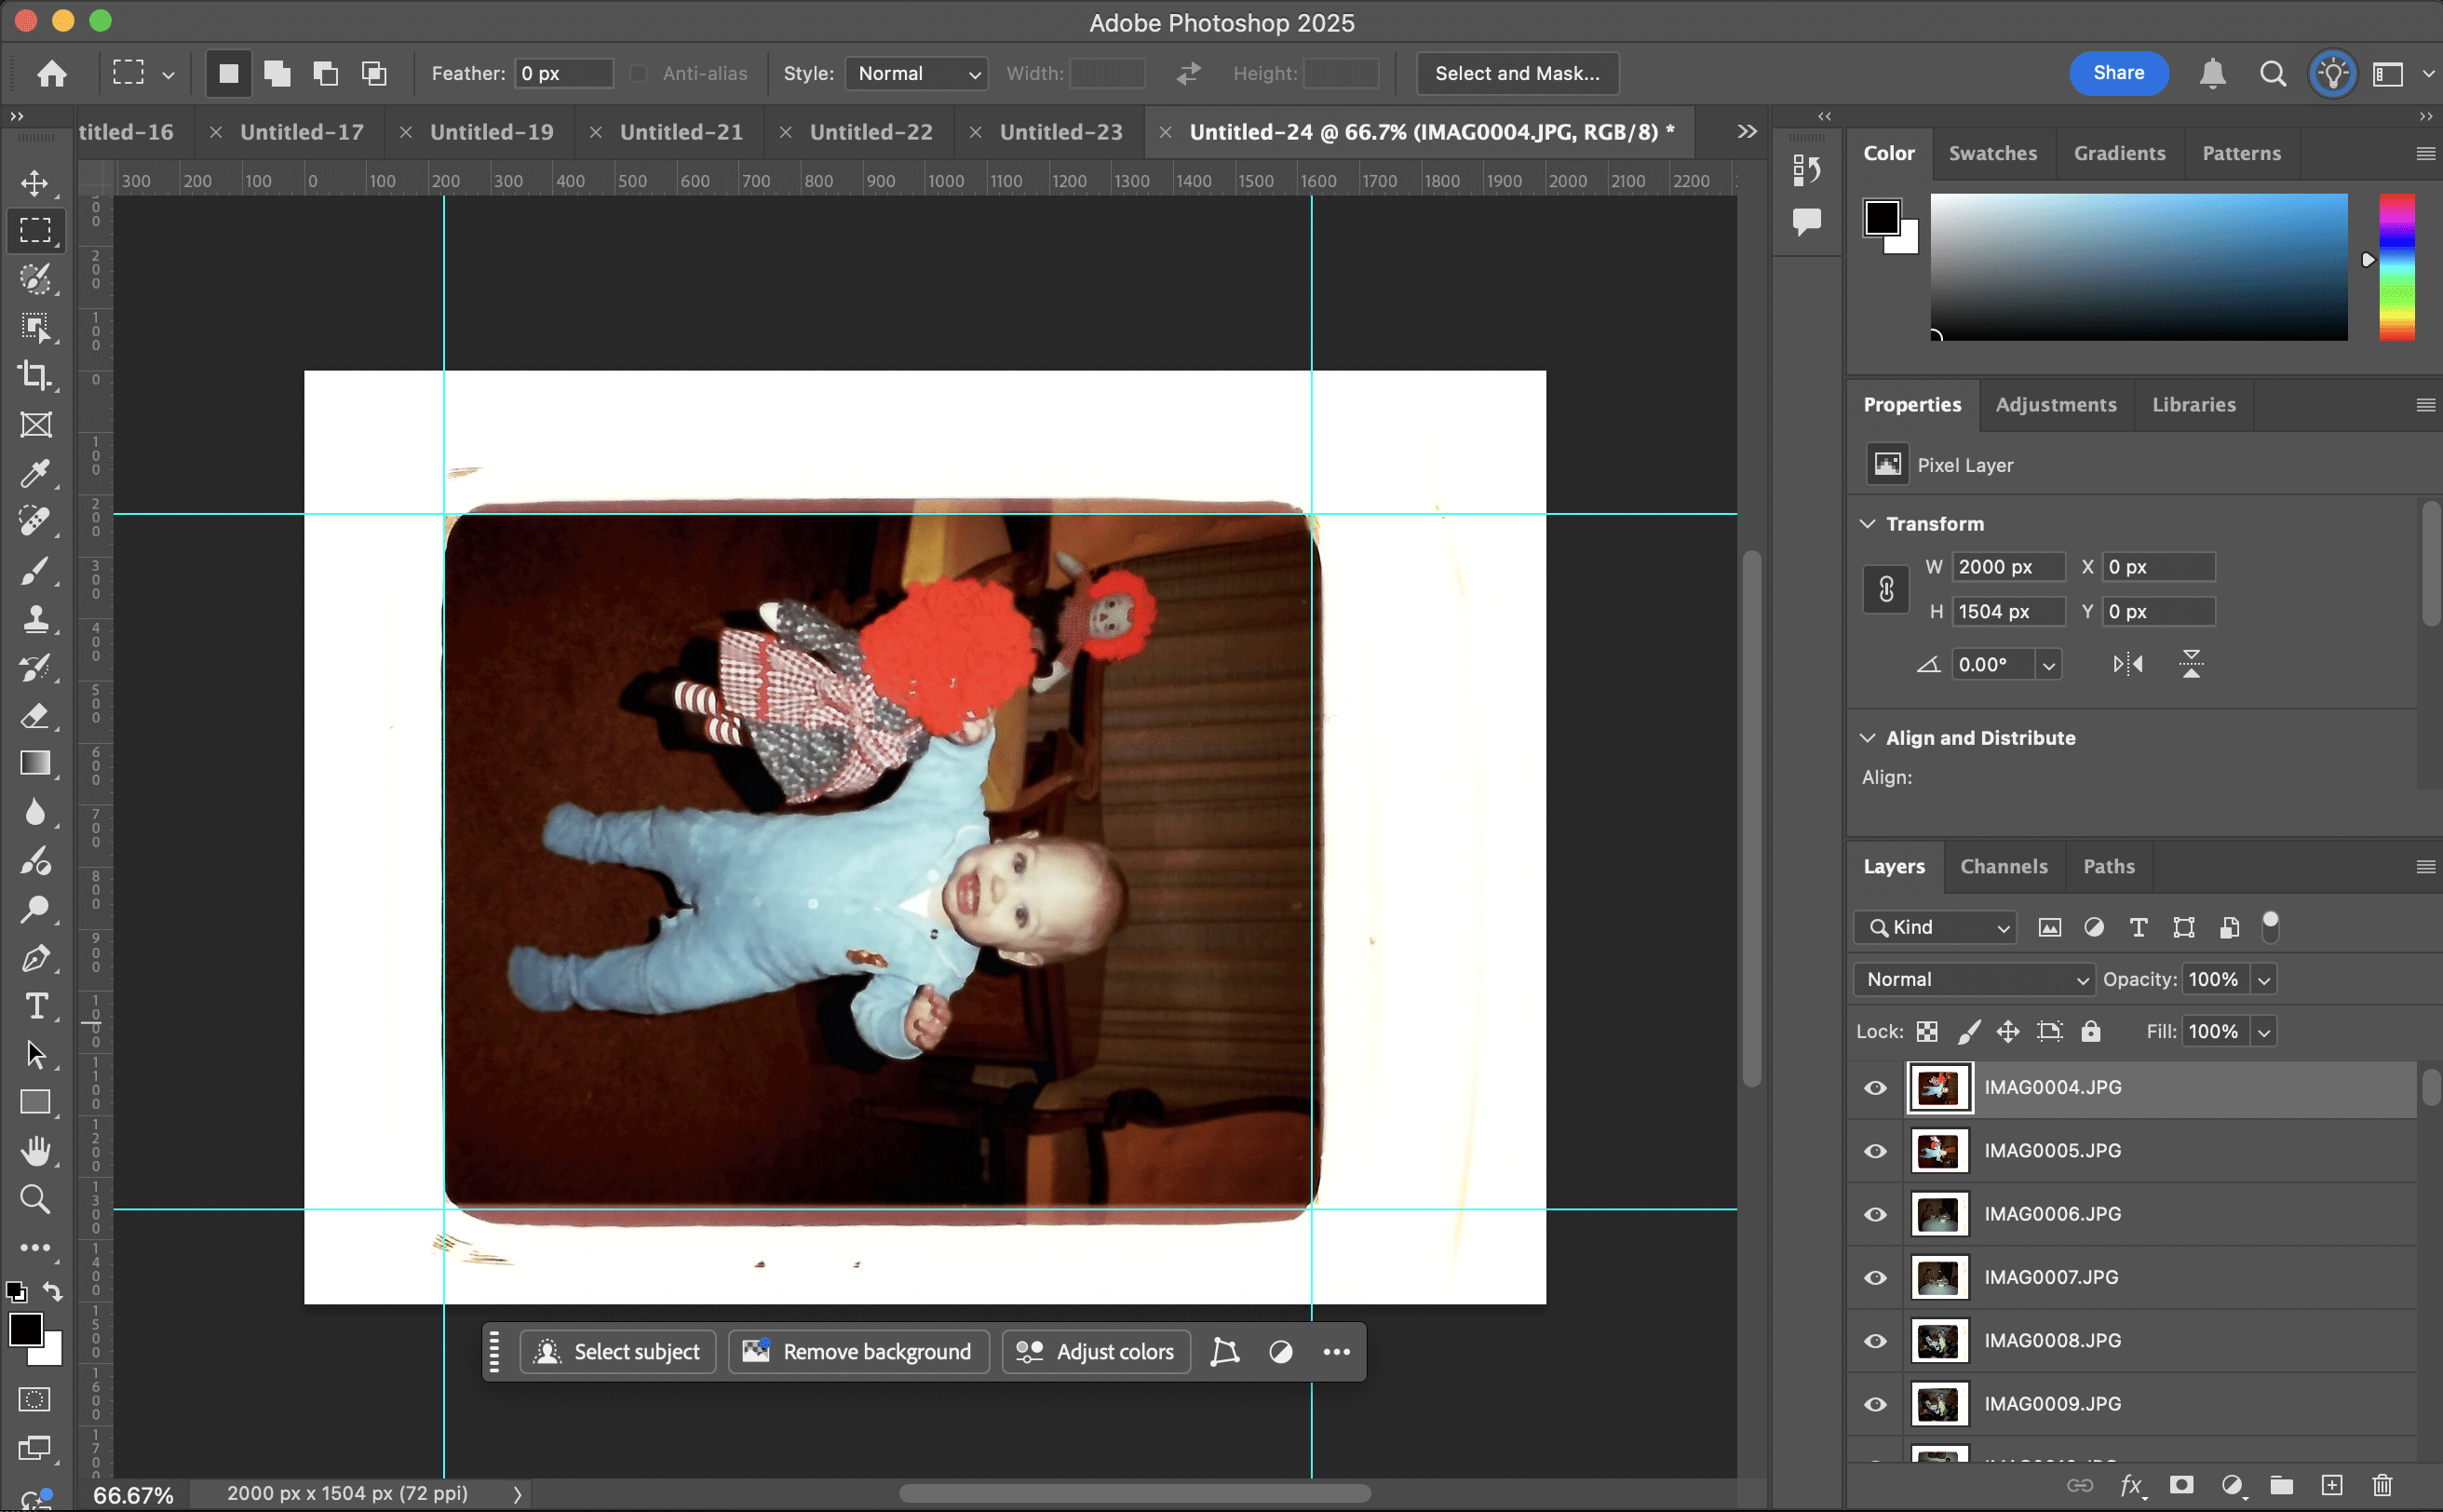
- Use the Select tool to select the interior of the box defined by the guides
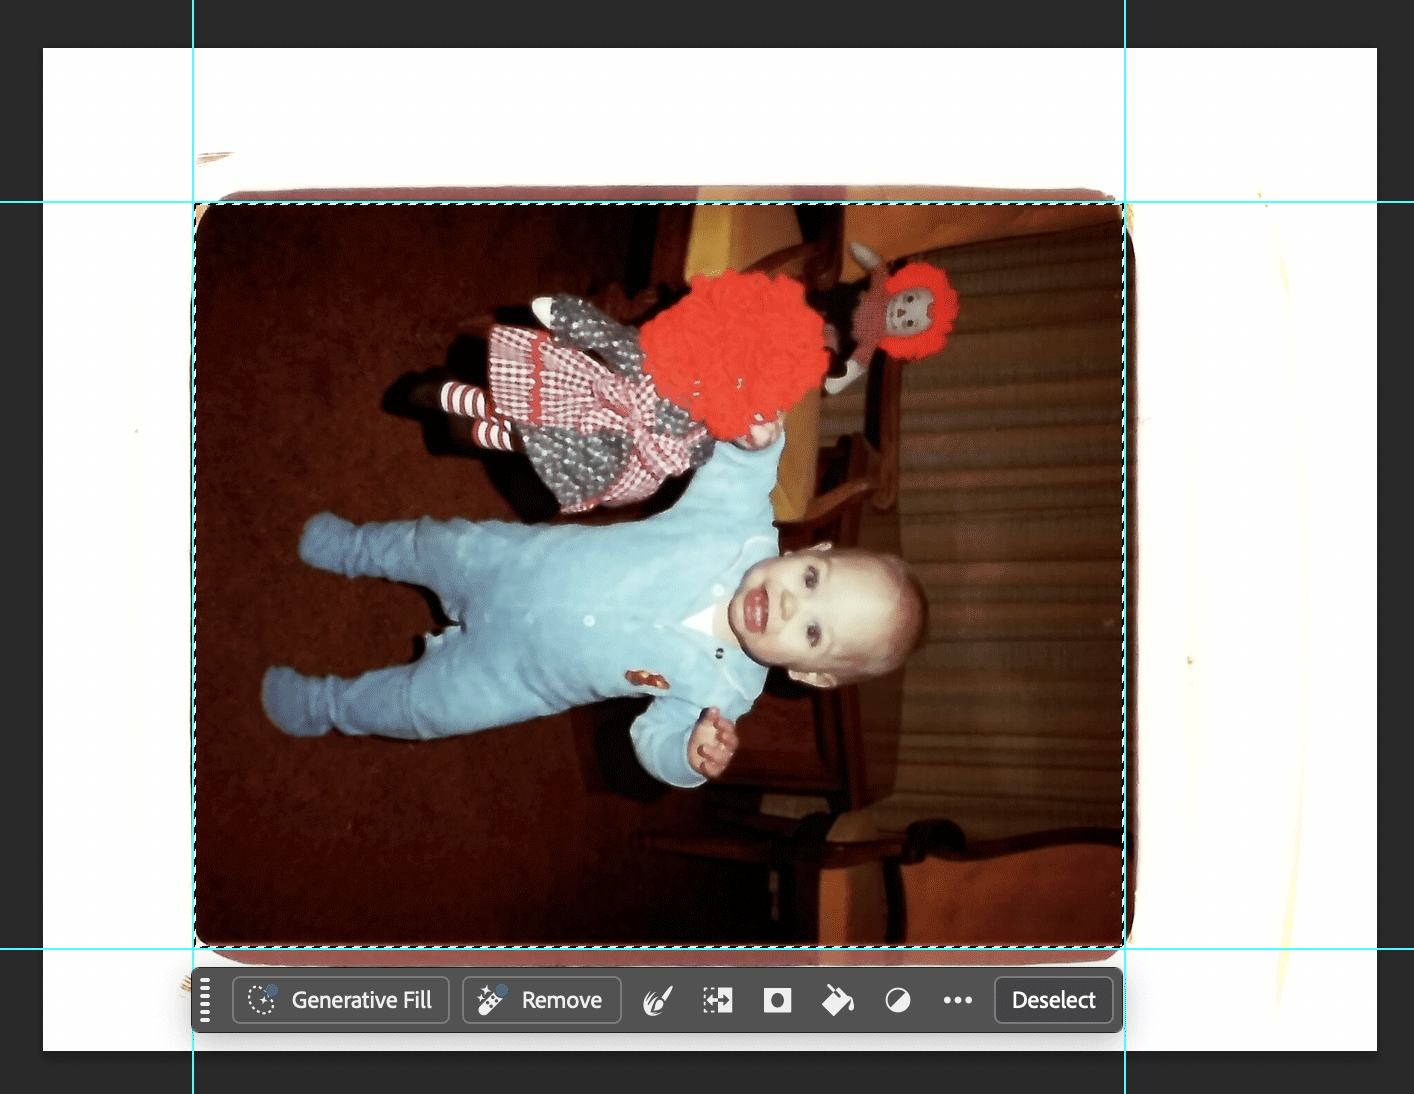
- Image -> Crop will crop the stack to your selection!
- File -> Export -> Layers to Files will export each layer as a separate file
I got through them all eventually. The quality is ok, but it’s not as good as the 35mm partially because the disc format pics are so small and partially because I don’t think they sit at an optimal distance from the scanner. I think these are candidates for being sent out to a professional service, but at least for now I have some digital copies of them and know what’s on the discs.
Some disc scans, as examples of the quality you might expect from this process:


And then, due to the way these images were quickly batched out into files by Photoshop, they effectively had such similar timestamps that Google Photos couldn’t reliably sort them by timestamp. I’m a stickler for sort order, so I sought help on the interwebs and found this extremely helpful article: Fix Google Photos Sort Order - Pasko’s Rants
(Perhaps I will add the steps here someday; but for now, the algorithm is basically: use a script to edit the exif data on the batched photos so their creation dates are spaced out by 1 second, then upload to Google)
Scanner dust
Dust accumulated like crazy during this project. The scanner comes with a dust cleaning tool but eventually the scanner accumulated a numbe of spots and specks that I can’t quite seem to get with the tool. They now appear as darker blobs that you can see in this gif comparing “before dust cleaning” to “after dust cleaning”.
 (I picked this low-contrast shot so the dust would be more visible)
At this point I am not sure how to clean these spots (and I know they’re in some of my project scans). I suppose that’s my only real criticism of this scanner: I can’t open it up and THOROUGHLY clean it.
Did I find anything cool?
Plenty of cool and long-forgotten pics, and I’m not sure I found anything that made me feel like I wasted my effort and time by not using a higher quality scanner.
Maybe 100 shots at most are worth having a higher res scan of them, the rest are great as they are. The Kodak Slide n Scan was a success - the pics are digital, we’ve looked at them for the first time in 20-30 years, and we’re satisfied that they exist as digital copies now. And, if we ever do decide to revisit them, they are easy to find in their binders.
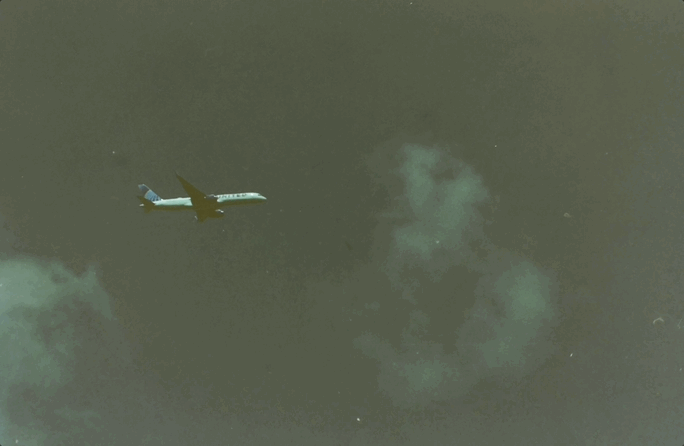
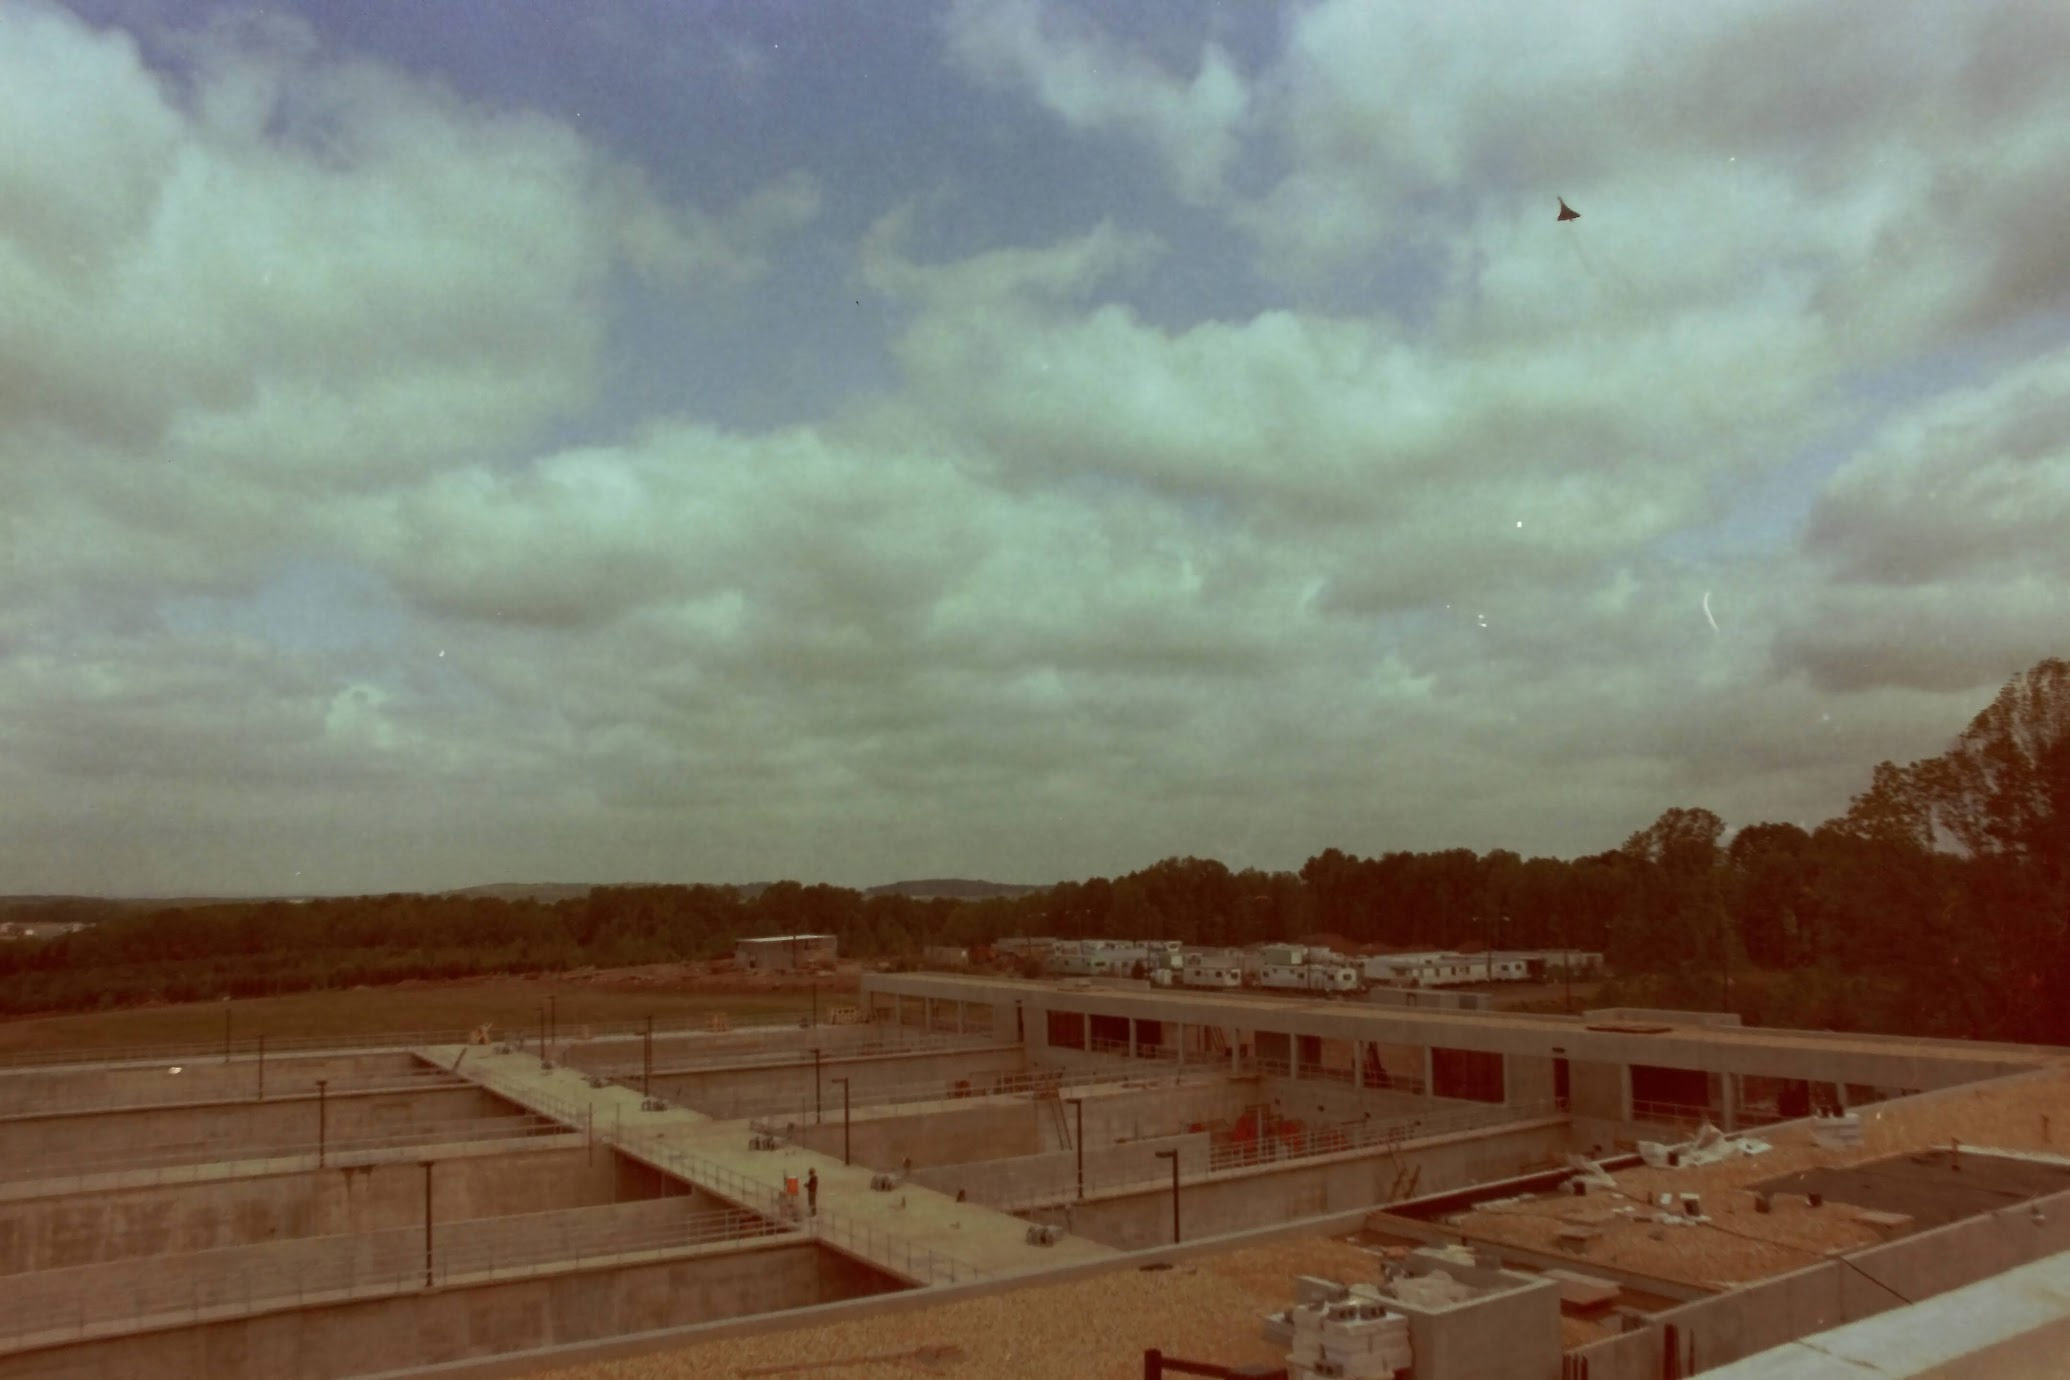
A couple of highlights, before we call this post done:
Me practicing my flying:

My dad caught this Concorde taking off in 1980:
Why do this?
I asked myself this question a lot during this project. It was forever-taking and tedious and I periodically had to re-motivate myself.
- A natural disaster (or a “decluttering project") would wipe out every photo my family took before 2001, which is nearly 50 years of photos
- The photos are hard to share in their current “print only” form (if we even have prints of them)
Ok, but why do it now?
- My parents are both still able to answer questions about the photos
- It’s too cold to ride my bike (one of the secrets to enjoying life in the US Midwest is to have a robust selection of “indoor hobbies” to do during the winter)
Why not send them to a service?
I wanted iron-clad control over how they were organized, both digitally and physically. I also felt it would be more expensive than doing it myself and possibly risky (what if the photos get lost?!).
In conclusion
There’s no sugar-coating it, though: this was a slog. I spent hours of evenings and weekends on this, and it felt endless. If you’re scanning thousands of negatives, you’ll want to organize your work in a way that lets you take breaks and not lose your place.
Realistically, I think these photos are probably only interesting/valuable to two more generations at most, so I focused my effort on building something neatly packaged that I could hand to my kids someday.
In any case, it’s satisfying to have everything digitized and organized!